Category: SEO

  • How to Run a Model Test Shoot in a Dark Industrial Studio (Lenses, Lighting, and 2 Looks in 4 Hours)

    How to Run a Model Test Shoot in a Dark Industrial Studio (Lenses, Lighting, and 2 Looks in 4 Hours)

    A model test shoot does not need six outfits, four lights and a full production crew.

    It needs a clear brief, two strong looks and enough time to make the model comfortable in front of the camera.

    A dark industrial studio gives you a useful starting point. The surfaces already have texture. The shadows already have depth. You can add one key light, bring in a controlled accent colour and build a full test shoot without constructing a set from scratch.

    This guide covers how to run the day in a photography studio Hackney setup, using two looks across four hours.

    At @38 in Clapton E5, you get the exclusive main floor, raw brick, dark wood, industrial structures, coloured lighting and a separate studio room for talent or changing.

    Shoot hire starts from £600 for up to 4 hours.

    Start with the brief

    A test shoot should show range without losing consistency.

    Before you arrive, decide what the images need to prove:

    • Clean agency-style portraits
    • Full-length images that show proportions
    • A strong editorial look
    • Natural expressions and movement
    • Enough variety for a portfolio or casting submission

    Do not arrive with a vague plan to “see what happens”.

    Plan two distinct looks:

    1. Wide texture look: the model works within the space. Show the brick, timber, steel, floor and coloured light.
    2. Tight portrait look: the model becomes the focus. Use controlled light, closer framing and less background information.

    Two looks are enough for four hours. More than that usually means less time shooting each one.

    Pack the right lenses

    You do not need a full lens case.

    Bring one lens for the environment and one for the portrait work.

    Look one: 35mm or 50mm for texture

    Use a 35mm lens on full frame when you want to show the model and the room together.

    It gives you enough width for full-length frames without making the space feel exaggerated. Keep the camera level and avoid placing the model too close to the edge of the frame. Wide lenses can stretch limbs and features when used carelessly.

    A 50mm lens is a safer option if you want a more natural perspective. It still shows enough of the industrial setting, but gives the model more visual weight.

    Use this look for:

    • Full-length images
    • Standing poses
    • Walking or turning movement
    • Seated portraits
    • Frames that include the architecture
    • Images for editorial or lookbook use

    Start around f/4 to f/5.6 if you want the model separated from the background while keeping the environment readable.

    Look two: 85mm for the portrait

    An 85mm lens is a reliable portrait choice.

    It compresses the background slightly and gives facial features a natural perspective. It also lets you work at a comfortable distance from the model, which helps the interaction stay relaxed.

    Use it for:

    • Headshots
    • Tight beauty portraits
    • Three-quarter frames
    • Side profiles
    • Expression changes
    • Details in styling, skin and makeup

    Start around f/2.8 to f/4. At wider apertures, focus becomes less forgiving. Make sure the eye nearest the camera is sharp before moving through a sequence.

    If you only want to bring one lens, use a 24–70mm zoom. It will cover most of the day and let you move between wide and tight frames quickly.

    One prime plus one zoom is enough. Do not spend the booking changing lenses every five minutes.

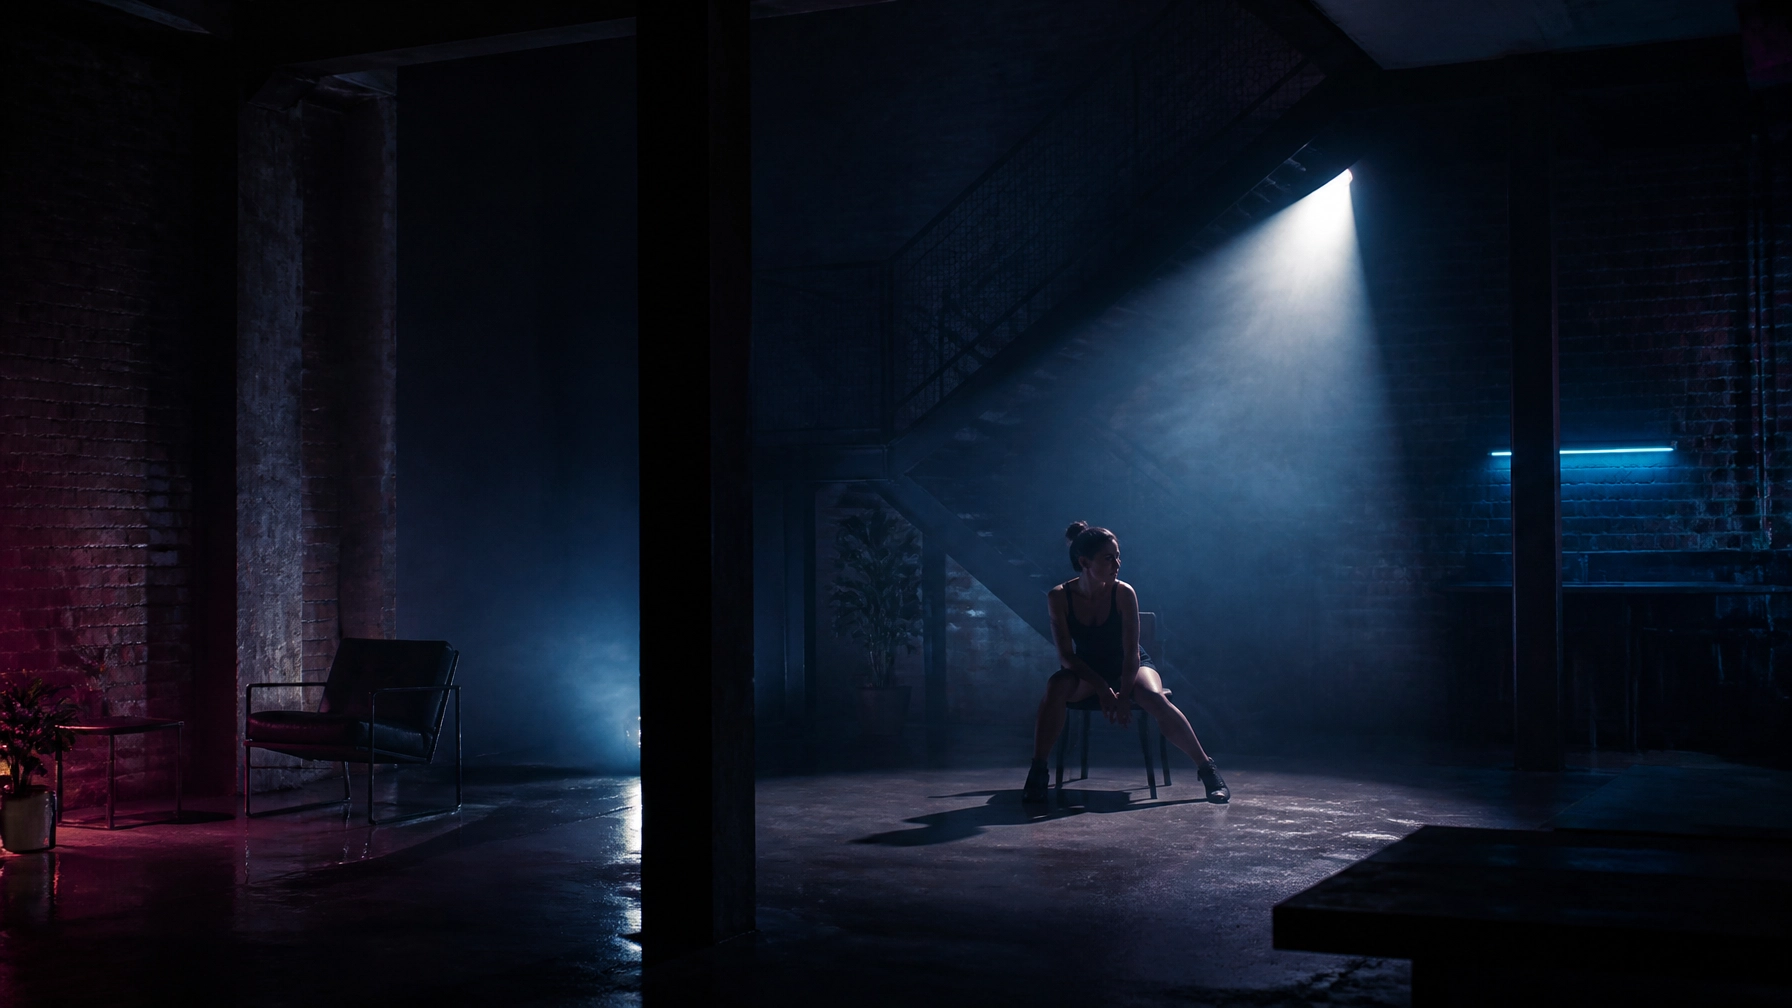
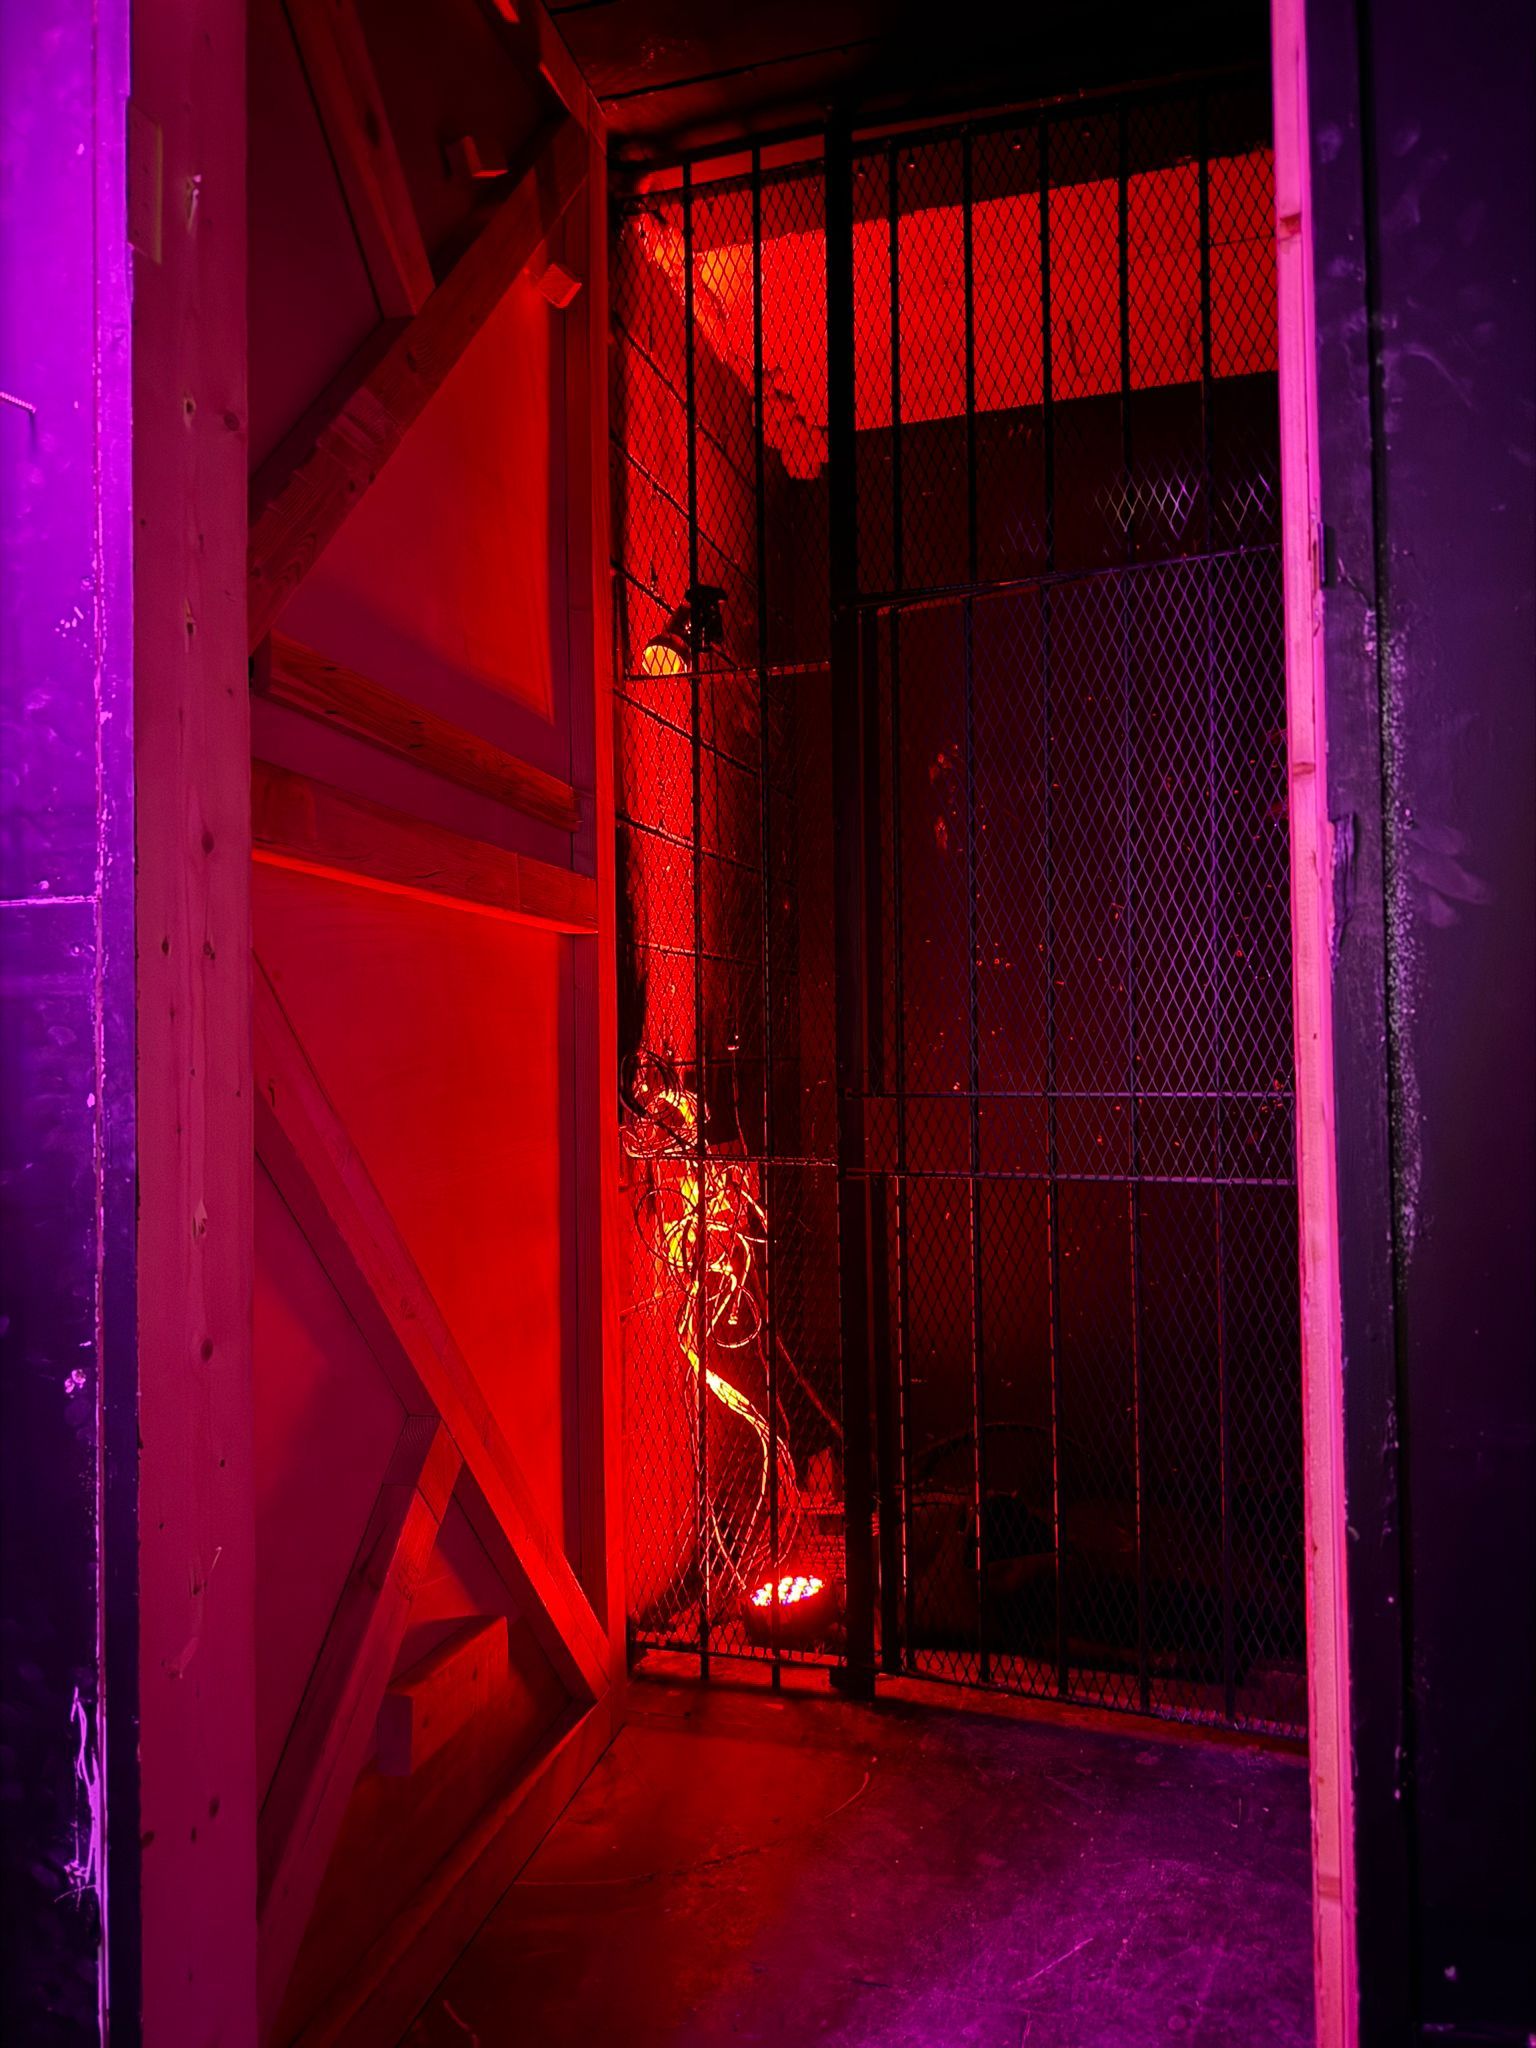
    Raw industrial staircase with dramatic red lighting for fashion portraits and editorial model shoots

    Build the lighting around one key

    Keep the lighting simple.

    Start with one key light. Add colour through the existing environment or a small accent source.

    A medium softbox is a useful choice for a model test. It gives you controlled, flattering light without flattening the face completely.

    Place the key:

    • Around 45 degrees from the model
    • Slightly above eye level
    • Angled down towards the face
    • Close enough for soft fall-off
    • Far enough to keep the model moving naturally

    Begin with the key light on its own. Turn off anything that creates unwanted mixed colour. Make a test frame before the model enters.

    You want to see where the light falls on the face, clothing and floor.

    Then add the accent.

    At @38, the main floor supports purple-to-red colour across the industrial surfaces. Use that colour as a controlled layer behind the model, not as the main source on the face.

    Purple works well for a cooler editorial look. Red pushes the image towards something heavier and more direct.

    Keep the model’s skin tones readable. Let the background carry the colour.

    For the wide look

    Keep the key slightly softer and more frontal.

    Let the background remain visible. Use the industrial surfaces as part of the image rather than hiding them in black.

    Place the model several feet away from the wall or structure where possible. That gives you separation and stops the key light from creating a flat shadow directly behind them.

    For the tight look

    Move the key further to the side.

    This creates more shape across the face and allows the shadow side to fall away. You can add a low-powered rim or accent light from behind if the model needs separation from the darker background.

    Do not add a second light just because you have one available.

    One key and one controlled colour source will usually give you more consistency than a complicated setup that takes half the session to adjust.

    Use the surfaces properly

    An industrial space gives you more than a backdrop.

    Use the room in layers:

    • Put the model in front of raw brick for texture.
    • Use dark timber for warmer contrast.
    • Shoot along the floor to create leading lines.
    • Frame through a metal structure.
    • Use the staircase for seated and lower-angle poses.
    • Let a darker corner reduce distractions in the tight portraits.
    • Place the model beside, not directly against, the wall.

    The space should support the model. It should not become a location scout’s portfolio.

    Check the frame before each sequence. Look behind the head. Check bright edges. Remove anything that pulls attention away from the subject.

    Raw does not mean careless.

    Moody red-lit lounge corner with exposed brick and dark leather seating at @38

    The four-hour schedule

    A half-day booking gives you up to four hours. Plan the clock before you start.

    00:00–00:35 : Load in and set the room

    Use the first 35 minutes to:

    • Bring in cameras, lights and stands
    • Choose the first shooting area
    • Clear cable paths
    • Set the key light
    • Select the purple or red accent
    • Mark the model’s standing position
    • Check exposure and white balance
    • Take test frames before the model is ready

    Keep the first setup simple. You can refine it once the model arrives.

    00:35–01:50 : Look one: wide texture

    Start with the easiest frames.

    Give the model time to settle. Begin with neutral standing poses before asking for stronger movement or expression.

    Work through:

    1. Full-length front-facing frames
    2. Three-quarter body angles
    3. Side profile
    4. Seated images
    5. Walking or turning movement
    6. Wider frames that show the space

    Use the 35mm or 50mm lens. Stay consistent with your height and framing before changing the angle.

    Ask for small adjustments:

    • Turn your shoulders slightly.
    • Drop your chin.
    • Shift your weight.
    • Look past the camera.
    • Bring your hands away from your body.
    • Hold that position.

    Small changes produce more usable images than constant direction.

    01:50–02:20 : Changeover

    Allow 30 minutes for:

    • Wardrobe change
    • Hair and makeup adjustment
    • Moving to a different surface
    • Shifting the key light
    • Changing the accent colour
    • Checking new framing

    Use the separate studio room at @38 as a practical holding and changing space. Keep the main floor clear for the camera and lighting setup.

    Do not rebuild everything. Change the mood, not the whole production.

    02:20–03:45 : Look two: tight portrait

    Move to the 85mm lens or the longer end of your zoom.

    Push the key light further to the side. Keep the background darker and let the purple-to-red lighting sit behind the model.

    Shoot:

    • Clean headshots
    • Neutral expression
    • Soft expression
    • Direct eye contact
    • Three-quarter portrait
    • Profile
    • Close detail
    • A few frames with movement

    Check focus regularly. Dark spaces and shallow apertures can make autofocus less reliable, especially when the model turns quickly.

    Give the model time to pause between expressions. The strongest portrait may appear after the obvious pose has finished.

    03:45–04:00 : Review and wrap

    Before you pack down, check that you have:

    • Clear headshots
    • Full-length images
    • At least one strong profile
    • A range of expressions
    • Images that show the model’s proportions
    • A few frames with visible industrial texture
    • A few tighter portraits with controlled colour

    Back up the files before leaving if possible.

    Purple-lit industrial lounge setup with dark seating and atmospheric depth for model test shoots

    Keep the model comfortable

    A test shoot is also a working relationship.

    Explain the plan before you start. Tell the model how many looks you are shooting, when the changeover happens and what kind of images you need.

    Avoid giving five directions at once.

    Use clear prompts. Let the model repeat a pose. Show a useful frame when you need to explain the adjustment.

    The aim is not to make the model perform a complicated concept. It is to create images that show how they move, listen, adapt and work in front of the camera.

    That matters to agencies, clients and future collaborators.

    Book the room

    If you are looking for a photography studio Hackney can offer with more texture than a white cyclorama, @38 gives you a ready-made industrial base.

    You get:

    • Exclusive main floor access
    • Raw brick, dark wood and industrial surfaces
    • Purple, red, teal and blue lighting potential
    • Track lighting for your own kit
    • Power throughout
    • A separate studio room for talent and changing
    • Parking by arrangement for equipment vans
    • No set build required

    Main Floor half day: £600 for up to 4 hours.
    Full day: £1,100 for up to 8 hours.

    Clapton · Hackney · London E5.

    View the shoot space or book a shoot day. We respond within 24 hours.

    What is your best model test-shoot tip: lens choice, lighting, posing or timing? Comment below and share it with other photographers. Then DM @38 or book your session at at38.org.
  • Editorial Model Shoots in East London: 5 Raw Industrial Looks That Beat Another White Cyclorama

    Editorial Model Shoots in East London: 5 Raw Industrial Looks That Beat Another White Cyclorama

    A white cyclorama is useful. It is also predictable.

    For editorial model shoots, the location does more than hold the camera. It gives the frame its texture, contrast and attitude before you place a light.

    That is the point of shooting at @38.

    Based in Clapton E5, our raw industrial venue gives you exposed brick, dark wood, concrete, steel structure and coloured lighting already in the room. No flats. No complicated set build. No spending half the booking making the background look less empty.

    You get the space. You bring the clothes, camera and talent.

    The Main Floor starts from £600 for up to 4 hours, with exclusive access to the space. Here are five looks to build around.

    1. Exposed brick. One red accent.

    Start with the wall.

    Raw brick gives an editorial shoot something a white studio cannot: surface. Every brick catches the light differently. The mortar adds rhythm. The imperfections stay visible without taking over the frame.

    Keep the setup simple.

    Place the model a few feet from the wall. Use a soft key light at 45 degrees to shape the face and clothes. Then add one red accent light across the brick behind them.

    That is enough.

    The red should not wash the whole scene. Keep it narrow and deliberate. Let it catch one side of the wall, the edge of a jacket or the model’s profile. The rest can fall into shadow.

    This works well for:

    • Black tailoring
    • Metallic accessories
    • Red, burgundy or deep brown styling
    • Beauty close-ups with graphic shadows
    • Full-length looks that need an urban edge

    The contrast does the work. The brick gives the image weight. The red adds a single visual decision.

    You do not need five lights and a built set to make the frame feel finished.

    At @38, the industrial surfaces are already there. You can move from a full-length editorial frame to a tight portrait without changing location.

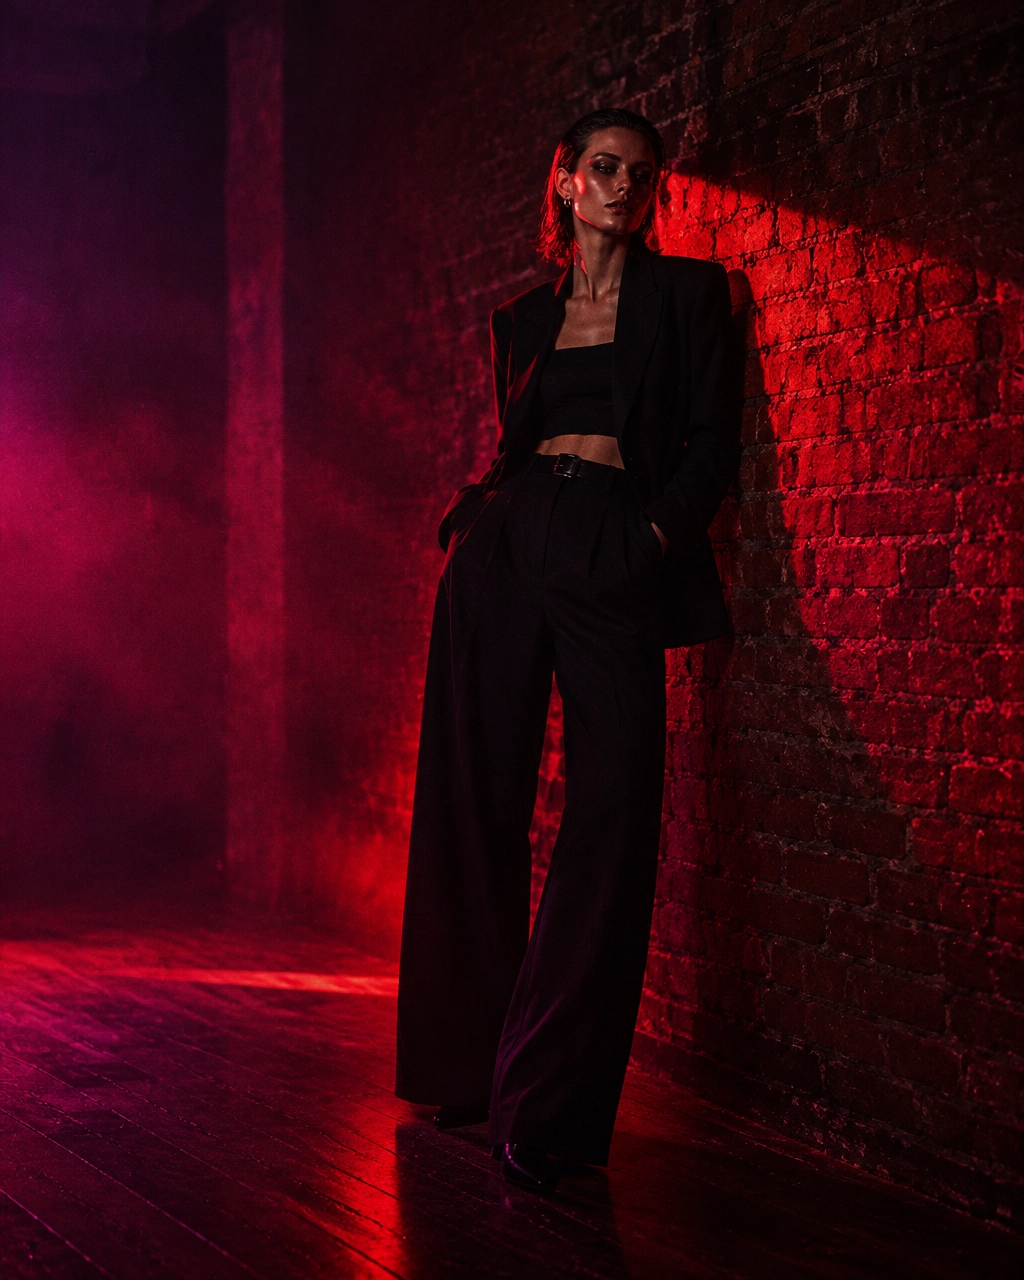
    Editorial model standing against exposed brick with a single red accent light

    2. Steel beams. Backlit silhouette.

    Use the architecture for shape.

    Steel beams and structural lines create a natural frame around the model. They also give you a strong option when the clothing is more sculptural or the pose needs to feel graphic.

    Place your light behind the model. A hard or focused source will create a bright edge around the shoulders, hair and clothing. Keep the front of the model underexposed or lightly filled.

    You are not trying to show every detail.

    A silhouette works when the outline is clear. Give the model a strong stance. Keep the pose clean. Let the structure sit behind them as a second layer.

    This look suits:

    • Avant-garde styling
    • Long coats and flowing fabric
    • Sportswear campaigns
    • Sunglasses and accessories
    • Movement-led frames
    • Black-and-white edits

    Shoot wide to show the beams and negative space. Then move closer for a crop where the rim light catches the profile.

    The key is separation. Keep the model away from the background where possible. This lets the light wrap around the figure instead of disappearing into the structure.

    The result feels more like a campaign image than a standard studio test. The location is not decoration. It is part of the composition.

    Fashion model in silhouette against steel beams and cyan backlight

    3. Concrete floor. Window light.

    Industrial does not always mean dark.

    Window light brings a softer editorial option into the space. Use the concrete floor as the base and let natural light create the direction.

    Place the model close enough to the window for the light to shape the face, but not so close that the background disappears. Turn the body slightly into the light. Keep the shadow side present.

    Do not flatten it with too much fill.

    The concrete gives the frame a quiet, architectural quality. It works particularly well when the clothes need to lead.

    Try:

    • Soft tailoring
    • Neutral palettes
    • Denim and workwear
    • Beauty and skincare
    • Minimal jewellery
    • Clean catalogue-to-editorial looks

    This is the setup for a model test, lookbook or campaign that needs texture without heavy colour.

    You can also use a reflector on the shadow side. Silver will add more edge. White will keep the result softer. If the daylight changes, introduce a single continuous or flash source to keep the exposure consistent.

    The important part is restraint.

    Let the window provide the mood. Let the model carry the styling. Let the floor and walls add the location detail.

    A good industrial photoshoot location in London should give you more than a dramatic background. It should give you different levels of light. At @38, you can work with window light, track lighting and the venue’s coloured wash rig in the same booking.

    Editorial model standing on a concrete floor in soft window light

    4. DJ booth. Blue-lit fashion moment.

    The DJ booth changes the energy immediately.

    Use it as a fashion set, not just a performance setup. The Pioneer CDJ decks, turntables and mixer give the model something physical to interact with. Hands have somewhere to go. The frame gets context.

    Keep the booth blue-lit. Use a neutral key on the model so the clothing stays readable. Let the blue light sit in the background and around the equipment.

    This works for:

    • Clubwear
    • Streetwear
    • Music-led campaigns
    • Artist portraits
    • Beauty looks with reflective details
    • Editorial images built around nightlife

    Shoot from the side for a layered frame: model in the foreground, decks in the middle, dark industrial surfaces behind. Then shoot tighter. Crop into the hands, jewellery, headphones or controls.

    You can also place the model behind the decks and shoot through the equipment. The controls become foreground texture. The blue wash creates separation without needing a constructed set.

    There is a practical advantage here, too. The booth is already installed. You do not need to source a desk, hire decks or build a club scene from scratch.

    Bring the look. The room already has the rest.

    Model posing at the blue-lit Pioneer DJ booth inside an industrial studio

    5. Leather lounge. Moody close-ups.

    Finish with a tighter look.

    The leather lounge corner is built for portraits. Dark leather reflects just enough light to show texture. The surrounding brick, wood and coloured glow keep the background from feeling flat.

    Use a small softbox, beauty dish or focused light from the side. Keep it slightly above the model’s eye line. Let the cheekbone, jaw and fabric catch the light.

    The mood should stay controlled.

    You do not need to light every corner. Leave some of the room in shadow. A red or purple practical light behind the model can create a soft colour separation without competing with the face.

    This setup is useful for:

    • Beauty portraits
    • Album artwork
    • Designer interviews
    • Artist press shots
    • Jewellery and accessories
    • Campaign detail frames

    Shoot seated first. Then move in for a close crop. Change the model’s direction rather than changing the whole set. A profile, a direct look and an over-the-shoulder frame can all come from the same corner.

    That is how you make a half-day booking work harder.

    Moody close-up of a fashion model seated in a leather lounge corner

    One booking. Five visual directions.

    A strong model shoot needs variation.

    Not random backgrounds. Controlled changes in light, texture and distance.

    At @38, you can move through five distinct looks without leaving the building:

    1. Exposed brick with a red accent for graphic colour and surface.
    2. Steel beams with a backlight for silhouette and structure.
    3. Concrete and window light for softer editorial frames.
    4. The DJ booth with blue light for club-led fashion imagery.
    5. The leather lounge for close portraits and darker campaign details.

    The Main Floor includes dark wood flooring, raw brick, industrial textures, a full colour wash rig and track lighting for your own kit. There is also a studio room for talent and changing. Parking is available by arrangement.

    Access starts from 08:00, Monday to Sunday.

    The booking is exclusive. Your shoot only.

    Plan your editorial shoot at @38

    Bring enough styling for two or three clear directions. Do not overpack the day with ten unrelated concepts.

    Start with the strongest look. Shoot the full-length frames while the model and team have the most energy. Move into the DJ booth or lounge for tighter work. Keep the final hour for close-ups, details and anything you missed.

    For a half-day shoot, you get up to 4 hours on the Main Floor from £600. A full day is available for up to 8 hours from £1,100.

    See the full Shoots @38 details or book a shoot day.

    You can also DM us through at38.org. Tell us your date, crew size and the looks you want to shoot. We respond within 24 hours.

    Which look would you shoot first: the red brick, steel silhouette, concrete window light, blue-lit DJ booth or leather lounge?

    Comment below. Then DM or book at at38.org.

  • 5 One-Light Setups You Can Shoot on Day One in a Hackney Industrial Studio (No Gels, No Set Build)

    5 One-Light Setups You Can Shoot on Day One in a Hackney Industrial Studio (No Gels, No Set Build)

    You do not need five lights to make an industrial shoot work.

    You need one controlled source. A strong location. A subject that can hold a frame.

    At @38, the backdrop is already there: exposed brick, steel structure, dark surfaces, a DJ booth, leather seating and dramatic colour. No flats. No paper rolls. No four-hour set build before the first test shot.

    This is a practical starting point for a photography studio in Hackney. Five one-light setups. Five different looks. All shootable on day one.

    Shoots at @38: Half day, up to 4 hours, from £600 on the main floor.
    Location: Clapton E5.
    Response: We respond within 24 hours.

    Start with one light. Keep the room dark.

    The mistake is trying to light the entire space.

    Industrial locations work because of contrast. Let the background fall away. Light the face, hands, product or key detail. Keep the rest in shadow.

    Bring one LED, strobe or flash with a softbox, reflector or bare head. You can change the look by moving the light, not by adding more equipment.

    A few starting points:

    • Place the light 45 degrees from the subject for a classic portrait shape.
    • Move it closer for more contrast and softer fall-off.
    • Move it further away for a wider, more even spread.
    • Turn down the ambient exposure before raising the light.
    • Shoot RAW if you are mixing daylight, LEDs and practical sources.
    • Use a black flag, board or the architecture itself to stop unwanted spill.

    If you are working with coloured practical lighting already in the room, do not fight it. Let the industrial environment provide the atmosphere. Your single source only needs to give the subject enough shape.

    For more location advice, see our guide to 7 industrial photoshoot mistakes and how to fix them.

    1. The red corner portrait

    One light against exposed brick.

    Start with the red-lit corner.

    Put your subject close to the exposed brick, then place the light just outside the frame at 45 degrees. Keep it slightly above eye level. Angle it across the face rather than directly into it.

    The red environment gives you the mood. The single light gives you the skin detail.

    Red corner portrait one-light setup in an industrial Hackney studio at @38

    The look

    This is the cleanest setup for:

    • Portraits
    • Artist press images
    • Fashion tests
    • Album artwork
    • Campaign stills
    • Social profile content

    Keep the light tight. You want the face and upper body to read, while the edges of the frame drop into red and black.

    Try short lighting by turning the subject slightly away from the source. The side of the face nearest the camera falls into shadow. The brick catches a small amount of side light and gains texture.

    Do not fill the corner evenly. That removes the depth.

    Quick adjustment

    Move the subject 30 centimetres away from the brick. The background will soften slightly, while the wall still gives you enough texture to establish the location.

    For a harder editorial look, use a smaller source or remove the diffusion. For softer skin, move the light closer and increase its apparent size.

    No gels required. The room is already doing the colour work.

    2. The steel beam silhouette

    Backlight through the structure.

    Industrial architecture is useful because it creates lines.

    Place your subject between the camera and a brighter section of the space. The steel structure, gantry or metal staircase becomes the frame. Put your one light behind the subject, slightly to one side, and expose for the brighter area behind them.

    Steel beam silhouette one-light setup in an industrial Hackney studio at @38

    The look

    This gives you a silhouette with a clean edge.

    Use it for:

    • Full-body fashion shots
    • Dance images
    • Music artwork
    • Movement tests
    • Artist portraits
    • Brand statements

    The key is not to make the subject completely disappear. Leave a narrow rim of light along the shoulder, hair, hands or jacket. That small separation is what keeps the frame legible.

    Start with the background one or two stops underexposed. Then bring the light around until it catches the edge of the subject.

    Ask the subject to move slowly. A turn of the head or a raised arm changes the shape of the silhouette. You can shoot a full series without moving the light.

    Quick adjustment

    For a stronger graphic frame, place the subject directly under a beam or inside a structural opening. Keep the camera low and let the vertical lines rise through the image.

    For a softer result, shift the light further behind the subject and allow a little detail into the front of the body.

    The building becomes the set. You only need to decide where the body sits inside it.

    3. The window-light editorial look

    Dramatic window light. One source to control the contrast.

    Use the window as the first light. Your additional light is there to shape the subject, not overpower the room.

    Place the subject near the window, turned 45 degrees away from it. Expose for the window or the brightest part of the scene. Then bring your one light in from the opposite side at low power.

    Window-light editorial one-light setup in an industrial Hackney studio at @38

    The look

    This creates a split between cool natural light and the deeper tones inside the space.

    It works well for:

    • Editorial portraits
    • Beauty and skincare
    • Fashion lookbooks
    • Interview stills
    • Product-led brand images

    Keep the window side brighter. Let the single light open just enough detail on the shadow side of the face.

    You are balancing two exposures:

    1. The darker industrial room.
    2. The brighter window and subject.

    Start in manual mode. Keep the ISO low if the ambient level allows. Choose an aperture that gives you enough depth for the pose and styling. Then adjust the shutter speed to control how much of the room comes back into the frame.

    Quick adjustment

    For a more cinematic frame, underexpose the room and let the subject sit between light and shadow.

    For a commercial look, raise the one light until the face is clear but the window still has shape. Do not let the fill become flat.

    If the daylight and practical lights are different colours, shoot RAW and make the mismatch part of the image. Industrial editorial work does not need to look clinically neutral.

    4. The blue booth music shot

    One light on the DJ booth.

    The booth is already a visual anchor. Pioneer decks, turntables, mixer controls and steel structure give the frame information before you add anything.

    Place your subject behind or beside the booth. Position the single light from the front-side, aimed at the face and hands. Keep the light narrow enough that the background stays blue and dark.

    Blue booth one-light setup in an industrial Hackney studio at @38

    The look

    This is built for:

    • DJ press shots
    • Live-stream thumbnails
    • Release campaigns
    • Artist announcement images
    • Behind-the-scenes content
    • Music brand work

    Ask the subject to work the controls. Hands on the mixer. One hand on the headphone. A turn towards camera between movements.

    The light should reveal the person and the important hardware. It does not need to illuminate every cable or wall.

    Let the blue ambient light sit in the shadows. It gives the image its context without turning the setup into a product catalogue.

    Quick adjustment

    Shoot one frame wide to show the structure. Then move in tight for the hands, jog wheels and face.

    Change the angle before you change the lighting. A low camera position makes the booth feel larger. A position just over the deck gives you the controls in the foreground and the subject behind them.

    Book the DJ setup if you need the equipment as part of the shoot. Use the booth as a working set, not a prop.

    5. The purple lounge mood

    Single source on the leather bench.

    Finish on the leather bench.

    Place the subject seated or leaning forward. Put the light close to one side, just outside the frame. Feather it across the body so the face, hands and leather catch the strongest part of the source.

    Purple lounge mood one-light setup in an industrial Hackney studio at @38

    The look

    This is the slower, more intimate setup.

    Use it for:

    • Artist portraits
    • Interview stills
    • Campaign detail shots
    • Jewellery and fashion
    • Founder profiles
    • Night-time social assets

    Leather holds a highlight. Purple light holds the background. The one source gives you the shape across the subject.

    Keep the pose simple. Sitting. Leaning. Looking away. Hands resting on the knees. You do not need to over-direct it.

    Let one side of the bench disappear into shadow. That is where the mood comes from.

    Quick adjustment

    Move the light lower for more shape across the face and torso. Raise it slightly for a cleaner portrait.

    Pull the subject away from the background if you want more separation. Push them closer if you want the purple light to wrap around the outline.

    This setup is useful when you need several looks in one booking. Change the wardrobe, lens and pose. Keep the light in place. You have a new frame without rebuilding the room.

    One booking. Five usable looks.

    A half day gives you enough time to work through all five setups without turning the shoot into a production exercise.

    A simple order:

    1. Red corner portrait while the team is fresh.
    2. Steel beam silhouette for movement and full-body frames.
    3. Window-light editorial look for softer detail.
    4. Blue booth music shot for performance content.
    5. Purple lounge mood for the final close-up portraits.

    Bring one light. A few modifiers. Gaffer tape. Wardrobe changes. Your camera.

    The main floor at @38 is ready for the rest.

    Half day, up to 4 hours: from £600.
    Clapton · Hackney · London E5.
    No set build required.
    We respond within 24 hours.

    Which setup would you try first: the red corner portrait, the steel beam silhouette, the window-light editorial, the blue booth or the purple lounge?

    Comment below and tell us. Then DM @38 or book your shoot.

  • Music Video Location Scouting in London: 10 Questions to Ask Before You Book an Industrial Space

    Music Video Location Scouting in London: 10 Questions to Ask Before You Book an Industrial Space

    A strong music video location does part of the production work for you.

    The right space gives the camera texture, depth and atmosphere before you bring in a single prop. The wrong one creates extra costs: set dressing, lighting fixes, crew movement problems and hours spent hiding plain white walls.

    If you’re scouting a music video location in London, ask these 10 questions before you book an industrial space.

    1. Is the texture already there?

    Start with the walls, floors and fixed details.

    Does the space have raw brick, dark timber, concrete, steel or worn surfaces that will read on camera? Or are you looking at a blank warehouse that needs a full art department to give it character?

    Texture gives your director and DP more options. Wide shots feel less empty. Close-ups have something behind them. Light catches uneven surfaces in a way it cannot catch on a flat studio wall.

    Ask to see the space in person, not only through heavily graded photographs.

    At @38, the main floor has raw brick, dark wood floors and industrial surfaces already in place. The look is built into the room. No set build required.

    2. What does the lighting look like on camera?

    A room can look dramatic in person and flat on camera.

    Check where the natural light enters. Look at the windows, ceiling height, practical lights and existing colour washes. Ask whether the venue has a lighting rig, track lighting or enough room for your own kit.

    You should also ask:

    • Can the house lighting be changed?
    • Are coloured lights included?
    • Can you black out the windows?
    • Is there space for stands, modifiers and cable runs?
    • Does the lighting work for both wide shots and close-ups?

    A good industrial location should give you a base look without limiting your own setup.

    @38 uses dramatic coloured lighting in purple, red, teal and blue. You can use the existing atmosphere or bring your own fixtures through the track lighting and power points.

    Location scout checklist setup in a dark industrial space for planning a music video shoot

    3. Can you get exclusive access?

    Exclusivity affects the whole day.

    If another booking is running next door, you may have noise bleed, people crossing the frame, limited access to shared areas and less control over the schedule. That can slow down a music video shoot quickly.

    Ask exactly what “exclusive” means. Does it include:

    • The full floor?
    • The entrance and holding areas?
    • The toilets and changing space?
    • The lighting rig?
    • Load-in and parking areas?
    • The whole building or only one room?

    At @38, shoot bookings include full main-floor exclusivity. Your crew, artist and equipment are the only production using the space during the booking.

    That matters when you’re shooting performance takes, moving a large camera package or working with a full cast.

    4. What’s the capacity for cast and crew?

    A location may look spacious until everyone arrives.

    Count the people involved in the real production. That includes the artist, dancers, extras, director, DP, camera team, lighting team, art department, HMU, wardrobe, production assistants and catering.

    Then consider the equipment:

    • Camera and lens cases
    • Lighting stands
    • Dolly or track
    • Monitors and video village
    • Wardrobe rails
    • Props
    • Bags and personal kit

    @38 has a 170-person main floor, which gives you room to scale from a small performance shoot to a larger cast setup. It also gives the camera more distance for wide frames.

    For a smaller shoot, the extra room still helps. You can separate the holding area, gear staging and active set instead of stacking everything into one corner.

    5. Is there a clean second look?

    One location should give you more than one frame.

    Ask whether the space has a clean secondary area for cutaways, wardrobe changes, close-ups or a different performance setup. It does not need to look completely different. A change in wall texture, lighting colour or camera direction can be enough.

    Look for:

    • A separate room
    • A stairway or corridor
    • A bar or lounge area
    • A darker corner
    • A plain wall for inserts
    • A different floor or ceiling treatment

    This is where industrial spaces can work hard. One raw room can deliver several visual treatments with a lighting change and a new camera position.

    Close-up of industrial textures including brick steel and concrete for a music video location

    At @38, the main floor, DJ booth, lounge areas and studio room give you options within the same building. You can keep the visual language consistent while changing the shot.

    6. What’s the acoustics situation?

    Music videos are visual productions, but sound still matters.

    You may need playback for the artist, dancers or extras. You may also be capturing behind-the-scenes content, dialogue, live vocals or social clips during the day.

    Ask about:

    • Traffic noise
    • Trains and aircraft
    • Nearby businesses
    • Air conditioning
    • Building reverberation
    • Noise restrictions
    • Playback volume
    • Any curfew for loud activity

    Large industrial rooms can sound lively, but hard surfaces may create unwanted echo. If you plan to record clean dialogue or live audio, check whether the venue has a separate controlled room.

    @38 has a dedicated studio room with controlled acoustics, separate from the main floor. That gives you a practical option for interviews, voiceover, livestreams or clean production audio alongside the main shoot.

    For a location-specific guide, Studio @38 sets out the room’s access, acoustics and booking options.

    7. How much set build is needed?

    Ask what has to be built, dressed or hidden before you can shoot.

    Every extra set element adds time, crew and budget. That may be the right call for a highly designed concept. But if you’re trying to keep the production lean, choose a space that already carries the mood.

    Check whether you need to bring:

    • Backdrops
    • Flats
    • Furniture
    • Draping
    • Props
    • Practical lights
    • Flooring
    • Temporary walls
    • Branding or signage

    Then ask what the venue allows. Can you move furniture? Tape to the floor? Hang lightweight items? Use haze? Bring in a small set piece?

    @38 is designed for productions that need more than a white box without building a full set. Raw brick, dark wood, industrial structures and coloured lighting are already part of the location.

    The set you couldn’t build. Already there.

    8. Is there power and load-in access?

    This is one of the questions that can make or break the day.

    Ask where the sockets are, how much power is available and whether the supply works for your lighting package. Find out if you can run cables safely without blocking walkways or fire exits.

    Also check the load-in route:

    • Can vans stop outside?
    • Are there stairs or narrow doors?
    • Is there a lift?
    • How close is the entrance to the shooting floor?
    • What time can you arrive?
    • Can cases stay on site during the booking?

    @38 has power throughout the main floor and access from 08:00 Monday to Sunday. Equipment van parking is available by arrangement.

    Put the load-in plan in writing before the shoot. It is easier to solve a cable or parking issue during the recce than at call time.

    9. Where is it and can crew park?

    London locations can look close on a map and still be difficult for a full crew.

    Check the nearest public transport, road access, parking restrictions and loading arrangements. Share the exact postcode with every department before the shoot. Ask whether cast cars, production vans and lighting vehicles can stop nearby.

    @38 is in Clapton E5, Hackney. That gives you an East London industrial setting without moving the production far outside the city.

    Parking is available by arrangement for equipment vans. Confirm the details with the venue team when you enquire.

    For larger productions or branded shoots, you can also review Events @38 if the brief needs wider access, audience capacity or a full-venue setup.

    Lighting setup on a music video shoot day inside a dark industrial warehouse

    10. What’s the rate and what’s included?

    Get the full number before you commit.

    Ask whether the quote includes exclusive access, lighting, furniture, power, changing space, parking, cleaning and overtime. Confirm the booking window too. “Half day” can mean different things from one venue to another.

    At @38:

    • Half Day: £600
    • Up to 4 hours
    • Exclusive main-floor access
    • DJ booth backdrop included
    • Studio room available for talent and changing
    • Coloured lighting rig and track lighting
    • Power throughout
    • Parking by arrangement

    A full day is £1,100 for up to 8 hours, with exclusive access from 08:00.

    You can see the current details on the Shoots @38 page. If you have a larger production, recurring campaign or multi-day brief, ask for a tailored quote.

    The right location removes work

    Scouting is not only about finding somewhere that looks good in a still photograph.

    You need a location that works for the whole production: the concept, the camera, the lighting, the cast, the crew, the schedule and the budget.

    A strong industrial photoshoot location in London should give you visual character without forcing you into a heavy set build. It should have enough access and power to keep the day moving. It should offer more than one usable frame.

    That is the point of @38.

    Dark industrial surfaces. Dramatic coloured lighting. Full exclusivity. A 170-person main floor. Clapton E5.

    From £600 for up to 4 hours.

    Book a shoot day at @38, or DM @38 with your date and production brief. We respond within 24 hours.

    What is the first question you ask when scouting a music video location? Comment below with the question that has saved your production : or the one you wish you had asked earlier.

  • How to Stream One DJ Set to 8 Platforms at Once : Without the Audio Falling Apart

    How to Stream One DJ Set to 8 Platforms at Once : Without the Audio Falling Apart

    One set. Eight destinations. One clean audio feed.

    Multi-platform DJ streaming is no longer a specialist move. DJs now broadcast to YouTube, Twitch, Instagram, Facebook, TikTok and other channels at the same time. The audience is split across platforms. Your signal chain should not be.

    The principle is simple:

    Decks → mixer → clean master output → OBS → multistream service → up to eight platforms.

    The difficult part is keeping the audio tight while you add cameras, lighting, encoding and multiple destinations.

    This guide walks through the setup.

    If you are looking for DJ studio hire London, @38 has the room for it. The main floor includes a Pioneer CDJ setup, turntables, professional mixer, full PA and monitor system, controlled acoustics and a dark industrial look that reads on camera.

    From £600 for a half day. Main floor. Clapton E5. We respond within 24 hours.

    Start with the signal chain

    Your stream should receive one deliberate audio source.

    Not your laptop speakers. Not a room microphone pointed at the PA. Not a mix of the master output and the headphone cue.

    The clean route is:

    1. Pioneer CDJ multi-player decks or turntables.
    2. Professional DJ mixer.
    3. Mixer master or record output.
    4. USB connection or external audio interface.
    5. OBS.
    6. Multistream service.
    7. Your selected platforms.

    The chain should be boring. That is a good thing.

    Every extra connection creates another place for distortion, hum, latency or double audio to appear.

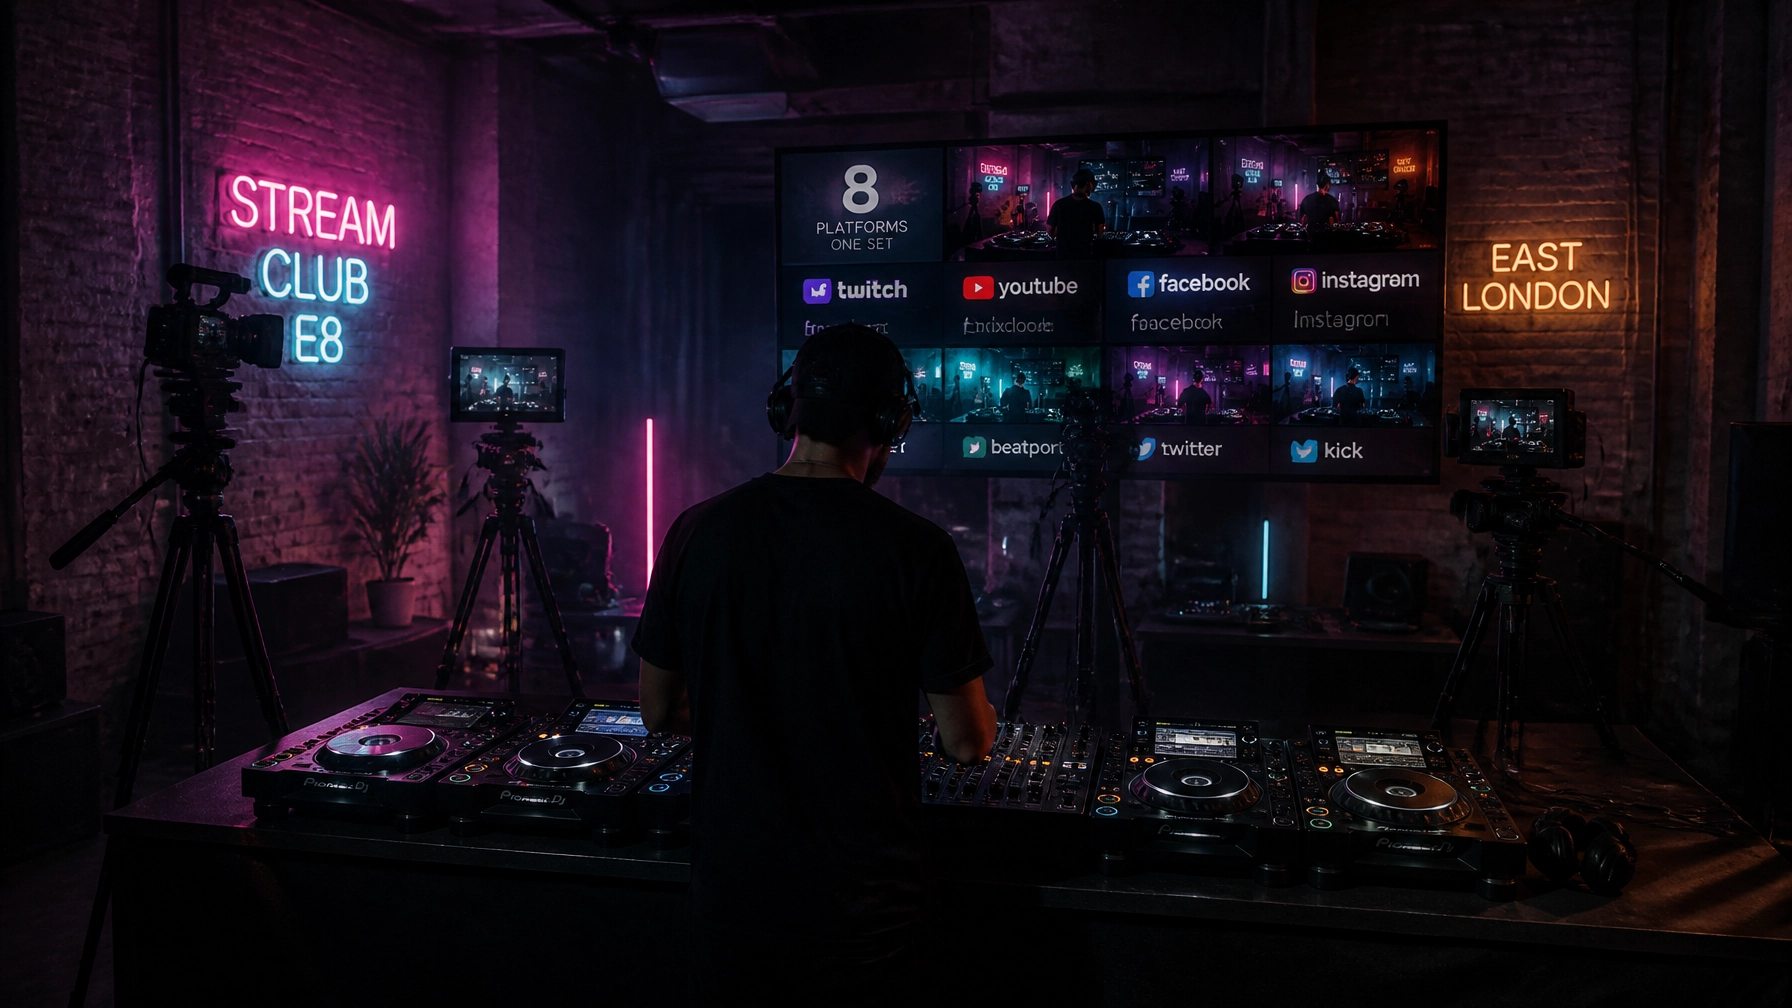
    Multi-platform stream setup with DJ mixer, OBS and streaming screens

    1. Build the set around club-standard equipment

    A broadcast starts with the performance source.

    At @38, you can work from a full Pioneer CDJ multi-player setup, turntables and a professional mixer. That means you are not translating your set through unfamiliar entry-level equipment before it reaches the stream.

    You can arrive with Rekordbox-prepared USBs, play vinyl, use DVS or build a hybrid setup around the available equipment.

    Before the booking:

    • Analyse your tracks in Rekordbox.
    • Set beatgrids and hot cues in advance.
    • Bring two prepared USBs.
    • Check your headphones and adapters.
    • Decide whether you are playing digital, vinyl or hybrid.
    • Prepare your platform titles, descriptions and artwork.

    Do not spend the first hour of your stream troubleshooting a USB that was not formatted correctly.

    Your audience will not see the problem. They will only see that the set has not started.

    2. Take the master output, not the headphone cue

    The audio sent to OBS should be the finished mix from the mixer.

    That normally means using one of two routes:

    USB from the mixer

    If your mixer supports USB audio, connect it directly to the streaming computer. Select the mixer as the audio input in OBS.

    This is usually the cleanest option. The mixer acts as the audio interface, reducing unnecessary conversions and extra hardware.

    Depending on the mixer, you may need to select the correct USB routing option, such as Mix, Master or Record Out.

    Check the manual for the exact channel assignment.

    Record or master output into an interface

    If the mixer does not provide USB audio, connect its record or master output to an external audio interface. Then connect the interface to the streaming computer.

    Use a proper line input. Avoid sending a hot booth or speaker output into a mic input. That is an easy way to introduce clipping.

    The goal is a stable stereo feed. Left and right. No cue. No system audio. No laptop notifications.

    OBS Studio is a useful starting point because it lets you manage audio, cameras, scenes and stream settings in one place.

    3. Set your gain before you press go live

    A strong signal is not the same as a loud signal.

    Keep the channel gains on the mixer in the green, with occasional movement into the amber. Avoid pushing everything into the red.

    In OBS, leave headroom. A useful starting point is to have your loudest sections peak around -6 dB rather than hitting 0 dB.

    Why?

    Because a clipped signal cannot be repaired later. Once the waveform is flattened, the distortion is part of the recording and the stream.

    Run a proper test:

    1. Play the loudest track in your planned set.
    2. Watch the mixer meters.
    3. Watch the OBS meters.
    4. Check the left and right channels.
    5. Record 60 seconds locally.
    6. Listen back on headphones and a phone.

    The phone test matters. A mix can sound balanced on studio monitors and still lose the vocal, bass or high-end on a small speaker.

    4. Keep OBS focused

    OBS should receive the sources you actually want.

    For a DJ stream, that could be:

    • Multi-camera 4K video.
    • The mixer’s master audio.
    • An optional microphone.
    • Branded graphics or overlays.
    • A holding scene for the start and end of the broadcast.

    Turn off anything you do not need.

    That includes:

    • Desktop audio.
    • Built-in laptop microphones.
    • Duplicate audio inputs.
    • Unused capture devices.
    • Automatic monitoring that creates an echo.

    Double audio is one of the most common problems in DJ streams. You hear the clean mixer feed and a second delayed version from another source. The result is phase issues, echo and a stream that feels loose.

    Monitor through the mixer and headphones where possible. Do not monitor the stream through OBS unless you have a specific reason and understand the delay.

    For more routing reference, the OBS DJ stream forum shows the kind of audio input and monitoring issues streamers regularly troubleshoot.

    5. Add cameras without compromising the set

    A DJ stream should show more than one locked-off wide shot.

    A practical multi-camera setup could include:

    • A wide shot of the full booth.
    • A close-up of the mixer and hands.
    • A side angle showing the decks and performer.
    • A detail angle for turntables, needles or track selection.

    Multi-cam 4K gives you room to crop, reframe and create vertical clips after the stream. You can use the same session for the live broadcast, YouTube upload, short-form edits and promotional stills.

    The room matters here.

    A white rehearsal box gives you very little to work with. You end up building the image from scratch with flags, backdrops and extra lighting.

    The @38 main floor already gives you texture:

    • Dark industrial surfaces.
    • Visible structure.
    • Controlled low-key lighting.
    • Deep shadows.
    • Cyan, purple and magenta accents.
    • A DJ setup that reads immediately on camera.

    The visual system does not need to compete with the performance. It needs to frame it.

    Close-up of Pioneer CDJ decks and professional DJ mixer

    6. Send one feed to multiple platforms

    Do not build eight completely separate broadcasts unless you have a production reason to do so.

    The simpler route is:

    OBS sends one feed to a multistream service. The service distributes it to your connected platforms.

    Services such as Restream allow you to connect multiple destinations and broadcast from one stream input.

    The workflow is usually:

    1. Create or connect your platform accounts.
    2. Add the destinations inside the multistream service.
    3. Copy the service’s RTMP server and stream key.
    4. Add those details to OBS.
    5. Confirm your video, audio and title settings.
    6. Start with a private or unlisted test.
    7. Go live to the selected platforms.

    You can broadcast to up to eight platforms from one production setup, depending on your service and account configuration.

    The advantage is control. You manage one scene, one audio feed and one main broadcast output.

    The platform-specific work still matters. Check each destination’s requirements for:

    • Account permissions.
    • Stream keys.
    • Resolution.
    • Bitrate.
    • Vertical or horizontal formatting.
    • Music rights.
    • Archive and replay settings.

    A clean feed does not remove platform rules. Check them before the show.

    7. Protect the broadcast with a proper test

    Never make your first test public.

    Set up an unlisted YouTube stream or another private destination. Run the full chain as if you were live.

    Test:

    • Audio level.
    • Audio sync.
    • Camera framing.
    • Camera exposure.
    • Lighting changes.
    • Internet stability.
    • Platform connections.
    • Stream delay.
    • Local recording.
    • Backup power and storage.

    Let the stream run for at least 10 minutes.

    Play a full transition. Speak into the mic if you are using one. Move through your planned camera scenes. Watch the output on a separate phone or laptop.

    Listen for:

    • Distortion on loud sections.
    • Missing low-end.
    • Delayed monitoring.
    • Cue audio leaking into the master.
    • Audio dropping when the camera scenes change.
    • A second audio source creating an echo.

    Fix the chain before the audience arrives.

    Why the room still matters

    Software cannot create atmosphere from nothing.

    You can broadcast from a bedroom. You can also spend hours trying to hide the bedroom.

    A dedicated video production studio London setup gives you more control from the start. The sound system is ready. The decks are recognisable. The lighting gives the cameras depth. The background has texture without a set build.

    At @38, the main floor is built for DJs who need the performance and the image to work together.

    You get:

    • Pioneer CDJ multi-player decks.
    • Turntables.
    • Professional mixer.
    • Full PA and monitor system.
    • Controlled acoustics.
    • Multi-camera 4K production capability.
    • Dark industrial surfaces.
    • Full exclusivity during your booking.
    • Capacity to scale from a solo set to a filmed session with a crew.

    Dark industrial DJ booth with multiple streaming screens

    Book the setup

    One DJ set can become a live broadcast, a long-form upload, eight platform cuts and a month of short-form content.

    But the chain needs to be right.

    Start at the mixer. Keep the master clean. Remove duplicate inputs. Test privately. Then send one stable OBS feed to the platforms that matter to your audience.

    @38 is in Clapton · Hackney · London E5.

    DJ studio hire London from £600 for a half day on the main floor. We respond within 24 hours.

    Book the DJ setup or explore @38.

    Which platforms do you stream to now : YouTube, Twitch, Instagram, TikTok, Facebook or somewhere else? Comment below and tell us what your current setup looks like. You can also DM @38 to talk through your session.

  • The Living Room Test: Why 45% of UK Podcast Fans Now Watch on Smart TVs (and How to Frame Your Studio for It)

    The Living Room Test: Why 45% of UK Podcast Fans Now Watch on Smart TVs (and How to Frame Your Studio for It)

    The living room test is simple.

    Would your podcast still look good on a television across the room?

    Not on a phone held 30 centimetres from someone’s face. Not in a thumbnail. On a 55-inch screen, with the lights down and the viewer watching from the sofa.

    First, a correction on the stat.

    Edison Research does not report that 45% of UK podcast consumers watch on smart TVs. Its latest UK research puts smart TV as the primary listening device at around 10%, while 72% of weekly podcast consumers actively watch video podcasts. The 45% figure relates to smart speaker ownership, not smart TV viewing.

    The wider point still stands. Podcasting is no longer audio-only. More people are watching. More people are watching at home. The frame, the lighting and the room now carry part of the show.

    That changes how you should book and use a podcast studio.

    Your podcast is being judged from the sofa

    A podcast can sound clean through headphones and still look unfinished on a television.

    Viewers notice:

    • Uneven lighting across faces
    • Distracting backgrounds
    • Blown-out highlights
    • Flat colours
    • Visible echo in the room
    • Microphones positioned too far away
    • A wide shot with no visual structure

    On a phone, some of these details disappear into a small screen. On a television, they become part of the experience.

    The living room viewer has time to look around the frame. They see the wall behind you. They see whether the shadows feel intentional. They notice if the background looks like a podcast set or a spare office.

    This is why a podcast studio hire in London needs to offer more than a table, two chairs and a pair of microphones.

    The room has to work on camera.

    1. Frame for the screen people actually use

    A good podcast frame has a clear hierarchy.

    The viewer should see:

    1. The guest
    2. The host
    3. The microphones
    4. Enough background to establish the world of the show

    Everything else needs a reason to be there.

    Start with the seating. Keep both people at a comfortable angle to camera. Avoid placing them too close to a wall. Give the background some depth, but do not fill every inch of the frame with props.

    The wide shot should establish the room. The tighter shots should carry the conversation.

    This is especially important for long-form shows. A viewer may be watching for an hour. The frame needs texture, but it also needs to stay calm.

    At @38, the dedicated podcast room uses two Wassily chairs beneath an industrial A-frame structure. The shape gives the frame structure without requiring a set build. The room already has a visual identity before you bring in a prop.

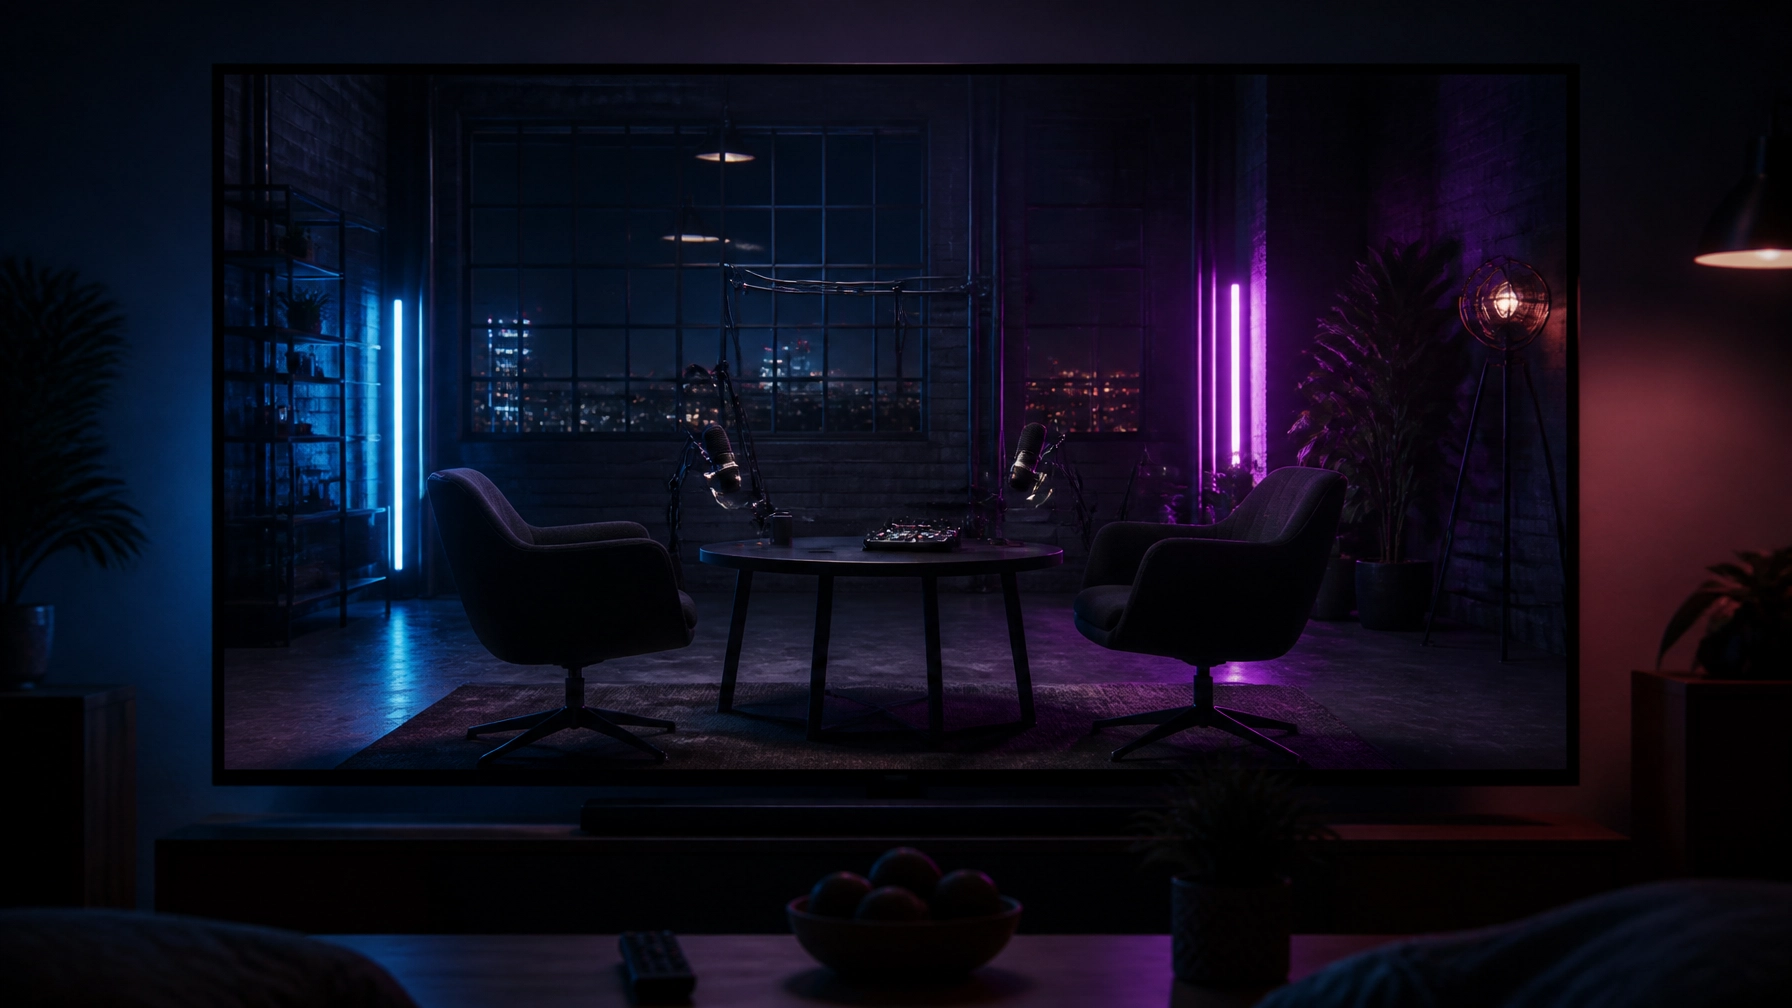
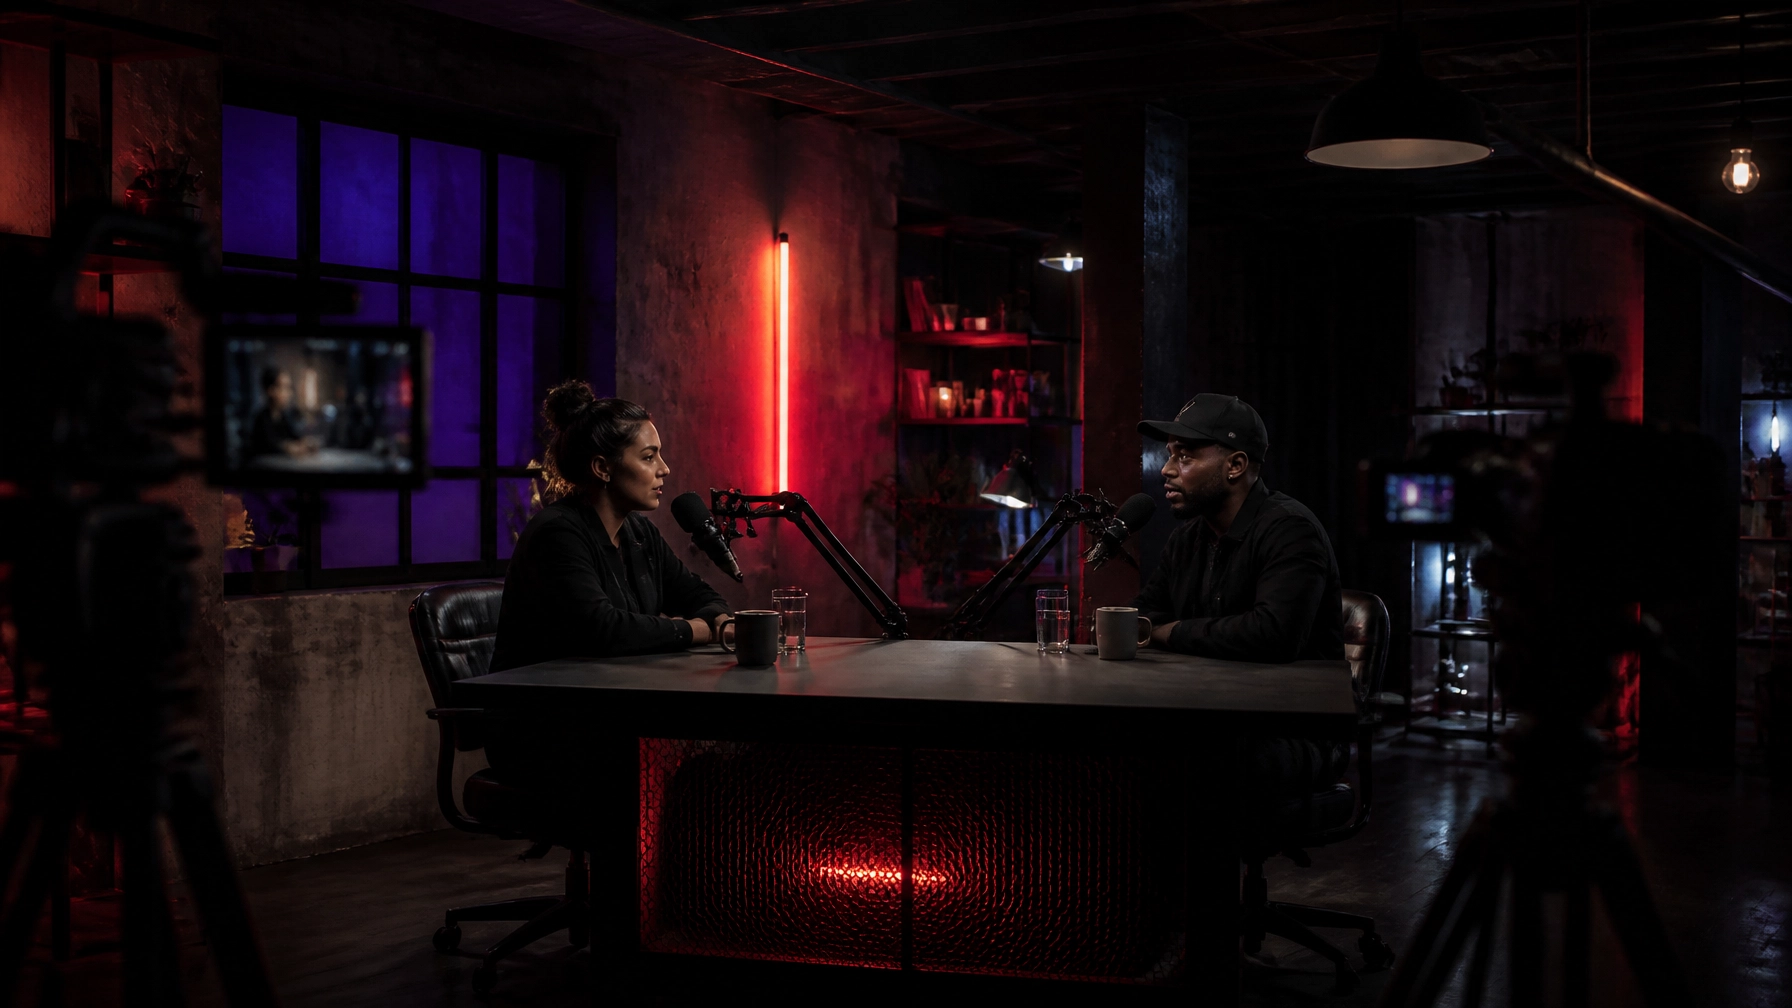
    Wide living-room-style view of a podcast studio setup with boom microphones and industrial background designed to read clearly on a big screen

    2. Let the lighting create depth

    Lighting for a living room screen is not about making everything bright.

    It is about controlling what the viewer looks at.

    A flat, fully lit room loses depth. A room with uncontrolled darkness loses faces. The balance sits between the two: clear skin tones in the foreground, deeper shadows and colour in the background.

    Purple-to-red studio lighting works because it separates the subject from the room. The colours give the background a controlled glow while leaving enough contrast around the faces.

    The key word is controlled.

    Red and purple light can quickly become too intense on camera. Saturated areas may lose detail. Bright practicals can blow out. Reflective surfaces can pull attention away from the conversation.

    Use coloured light as a wash, not a distraction.

    Keep faces readable. Keep the background darker. Let the industrial details sit inside the shadows rather than competing with the speakers.

    A large television will expose bad lighting decisions quickly. If the background is brighter than the subject, the eye goes there first. If every surface is the same brightness, the frame feels flat.

    The aim is simple: make the people clear and let the room provide the atmosphere.

    3. Choose a backdrop that does not need dressing

    A white wall gives you a blank canvas. It also gives you a set-building problem.

    You may need to add:

    • Lighting
    • Texture
    • Furniture
    • Shelving
    • Artwork
    • Practical objects
    • Branding
    • Colour

    That takes time. It also creates more decisions on the day.

    An industrial backdrop does some of the work for you.

    Exposed timber, dark metal, brick, concrete and structural details add texture without becoming a visual maze. They give the camera something to hold onto between cuts.

    The backdrop still needs to be checked. Raw does not mean random. Look for:

    • Clean sightlines
    • No distracting objects behind heads
    • No bright edges pulling focus
    • Enough separation between people and background
    • Texture that holds detail without becoming noise

    The best room is ready before the cameras arrive.

    At @38, dark industrial surfaces, cage partitions and coloured light create a background that reads clearly without additional set building. You can bring your own brand elements, but you are not starting with an empty box.

    Podcast studio lighting setup composed for smart TV viewing, with clear foreground subjects and controlled industrial background depth

    4. Keep the audio controlled

    The living room test is visual, but bad audio will still end the session.

    Television speakers make room problems obvious. Echo sits around every word. Background noise becomes part of the show. A microphone placed too far away captures more room than voice.

    Your recording studio needs controlled acoustics.

    That means:

    • No obvious echo
    • No bleed from another booking
    • Microphones close enough to capture the voice properly
    • Stable positioning throughout the conversation
    • A room quiet enough for edits and clean dialogue

    Broadcast-quality microphones are part of the visual language too. The microphone tells the viewer that this is a considered production. It gives the host and guest a clear place to speak.

    But the microphone should not block the face or dominate the frame. Boom arms need to be positioned for both sound and composition.

    This is where a dedicated recording studio in Hackney is different from a bedroom, office or improvised living-room setup. The room is designed around the conversation. You should not have to choose between clean sound and a usable frame.

    5. Build for long-form viewing

    A podcast episode may be recorded in one afternoon. It may then be watched in pieces over several weeks.

    That means the setup needs to survive repetition.

    Keep the visual language consistent:

    • Same seating
    • Same microphone positions
    • Same lighting direction
    • Same background
    • Same colour palette
    • Same camera logic

    Consistency makes a show easier to recognise. It also makes a series easier to produce.

    A fixed room helps. You can return to the same setup without rebuilding the frame every time.

    At @38, the podcast room is independent of the main floor. It includes twin broadcast-quality boom-arm microphones, adjustable purple and red lighting, two Wassily chairs and controlled acoustics. The room is private during your session.

    Book it for one episode, a run of interviews or a full series.

    Dark industrial podcast room with clean sightlines and wide TV-viewing composition for living room watchers

    The @38 setup

    The studio room at @38 is built for the living-room viewer.

    You get:

    • Twin broadcast-quality boom-arm microphones
    • Two Wassily chairs
    • Adjustable purple and red studio lighting
    • Controlled acoustics
    • A private room independent of the main floor
    • Full exclusivity during your session
    • Access from 08:00, Monday to Sunday

    The room works for long-form conversations, solo shows, panel recordings, interviews and video-led media production.

    Rates are clear:

    • Half Day: £175 , up to 4 hours
    • Full Day: £300 , up to 8 hours
    • Series packages: available for recurring bookings

    Located in Clapton E5, @38 gives you a prepared room with a dark industrial look. No grey curtain. No emergency set dressing. No need to turn a spare room into a studio before the guest arrives.

    Private podcast studio room framed for long-form smart TV viewing, with stable wide composition, boom-arm microphones and industrial structure

    Run the living-room test before you publish

    Before you lock the edit, watch a section of the episode on a television.

    Do not watch it at your desk.

    Sit back. Turn the volume down. Look at the frame from a distance.

    Ask:

    • Can you see both faces clearly?
    • Does the background support the conversation?
    • Are any highlights too bright?
    • Do the colours feel deliberate?
    • Does the room look consistent with the subject?
    • Can you listen without noticing the acoustics?
    • Would you keep watching for another 30 minutes?

    If the answer is no, the problem may not be the edit.

    It may be the room.

    Book the room

    Video podcasting is moving into the living room. Your studio needs to work there.

    Book the Podcast Studio at @38 for from £175 for up to 4 hours, or check the Studio Room for longer recording and media production sessions.

    You can book a podcast session directly. We respond within 24 hours.

    Where do you watch podcasts : phone, laptop or television? Comment below and tell us what makes you stay with a show. Then DM @38 or start your booking at at38.org.

  • YouTube Just Overtook Spotify for UK Podcasts : 5 Video Setup Upgrades That Actually Move the Needle

    YouTube Just Overtook Spotify for UK Podcasts : 5 Video Setup Upgrades That Actually Move the Needle

    YouTube just overtook Spotify as the UK’s most-used podcast platform.

    According to Edison Research, 29% of weekly UK podcast listeners now choose YouTube as their main podcast service. Spotify sits just behind at 28%.

    It is a narrow lead. The shift is not.

    Podcasts are no longer audio-only shows with a camera pointed at the table. They are filmed conversations. Cut-down clips. Shorts. Reels. Thumbnail-led discovery. A full episode might still be listened to on headphones, but the first contact increasingly happens on screen.

    Edison’s UK research also found that 72% of weekly UK podcast consumers now watch video podcasts. That makes the studio setup part of the format : not an optional extra.

    If you are looking for podcast studio hire in London, start with the five upgrades below. They make the difference between a recording that simply exists and one that is ready to publish across platforms.

    At @38 in Clapton E5, a half-day podcast studio session starts from £175 for up to 4 hours. You get a dedicated room, twin boom-arm microphones, controlled acoustics and a pre-styled visual environment. No set build required.

    1. Use broadcast-quality microphones

    Good video cannot rescue bad audio.

    A viewer might tolerate a simple camera angle. They will not tolerate voices that sound distant, harsh or uneven. If the guest is difficult to hear, they leave before the conversation gets going.

    A proper podcast setup starts with the microphones.

    Use a dedicated mic for each speaker. Keep the microphones close enough to capture clear speech without forcing guests to lean forward. Mount them on boom arms so the position stays consistent during a long conversation.

    The result is more than cleaner sound. It makes the recording easier to edit. Easier to level. Easier to repurpose into clips.

    At @38, the podcast room is set up with twin broadcast-quality boom-arm microphones. The arms keep the frame clean while giving each speaker a consistent recording position.

    That matters when you are recording:

    • Two-person interviews
    • Solo podcast episodes
    • Brand conversations
    • Panel discussions
    • Video clips for social platforms
    • A full series in one booking

    You should be able to focus on the conversation, not whether the mic has moved six inches away from your mouth.

    Twin boom-arm microphones in a broadcast-quality podcast studio with dark industrial styling

    2. Control the lighting before you press record

    Lighting changes how professional the whole production feels.

    You do not need a wall of cinema fixtures. You do need consistency. Faces should remain visible. Skin tones should not shift from purple to blue between shots. Highlights should not clip whenever someone turns towards the light.

    Start with three decisions:

    1. Where the key light falls
    2. How much separation the subjects have from the background
    3. Which colour defines the room

    For a video podcast, controlled colour can become part of the show’s identity. A purple-to-red wash gives the frame depth without covering the room in distracting set dressing. It creates a recognisable look that can carry through thumbnails, clips and full episodes.

    The lighting should support the conversation. It should not compete with it.

    At @38, the podcast room uses adjustable purple and red studio lighting. The dark palette gives the cameras something to shape. The coloured wash creates contrast around the chairs, microphones and background structure.

    That gives you a finished visual direction as soon as you arrive.

    Purple and red studio lighting across a dark industrial podcast set

    This is one reason a dedicated video production studio in London can save time. You are not starting with an empty room and a list of lights to hire. You are starting with a look.

    3. Choose a backdrop with character

    A blank wall is not automatically clean.

    On camera, it can look flat. It can make the conversation feel like a remote call. It gives the viewer no sense of place.

    A backdrop with texture creates depth without needing a complicated set. Exposed brick. Dark metal. Structural timber. Mesh. Concrete. Strong shadows. These details give the frame something to hold onto.

    The important part is restraint. The background should support the speakers, not swallow them.

    This is where raw industrial spaces work well for podcasts. The architecture already has visual information. You can create a strong frame without building a fake wall or bringing in multiple flats, props and branded panels.

    At @38, the podcast room includes two Wassily chairs, dark structural elements and atmospheric lighting. The space is styled before the booking starts.

    No set build required.

    Characterful industrial podcast backdrop with textured surfaces and moody purple-red lighting

    A characterful backdrop also gives you more options during one session. Use the main two-person setup for the full episode. Move to a tighter angle for short-form clips. Capture a few stills against the industrial surfaces for promotion.

    One room. More than one output.

    For more on the shift from audio-only recording, read 72% of UK Podcast Listeners Watch Video Now.

    4. Treat acoustics as part of the picture

    Acoustics are invisible on screen. They are obvious in the edit.

    Hard walls and empty rooms create reflections. Those reflections make voices sound boxy, distant or metallic. You can try to fix some of that afterwards, but the cleaner solution is to record in a room designed for controlled sound.

    Good acoustics help you capture:

    • Clearer speech
    • Less room echo
    • More consistent levels
    • Cleaner pauses
    • Fewer distractions during editing

    This is particularly important for long-form interviews. A one-hour conversation contains hundreds of cuts, breaths and changes in speaker position. If the room tone is inconsistent, every edit becomes more noticeable.

    At @38, the podcast room has controlled acoustics and is independent from the main floor. That means the recording setup is separate from the rest of the venue.

    You can keep the room focused on the conversation. No competing event setup. No other clients moving through the frame. Full exclusivity during your session.

    That is the practical difference between recording in a room that happens to be available and booking a room built for the job.

    5. Build a multi-camera frame

    One locked-off camera can document a conversation.

    Multiple cameras can edit it.

    A basic multi-camera setup usually gives you:

    • A wide shot of both speakers
    • A dedicated angle for the host
    • A dedicated angle for the guest
    • Flexible close-ups for clips
    • Cleaner edits between questions and answers
    • More visual movement without interrupting the conversation

    The key is consistency. Match the cameras as closely as possible. Keep exposure and colour temperature aligned. Check eyelines before the recording starts. Leave enough space around the frame for captions and platform crops.

    YouTube may be the main destination, but the same recording needs to work vertically for Shorts, Reels and TikTok. Shoot with those formats in mind. A face too close to the edge of a horizontal frame may disappear when cropped to 9:16.

    A multi-camera plan also helps the edit feel natural. Cut to the listener when the guest speaks. Use the wide shot to reset the pace. Hold on a close-up when the point matters.

    The viewer may not notice the camera changes consciously. They will notice if the episode feels static.

    At @38, the room gives you a controlled starting point for interviews and media production. Bring your camera team, use the available space efficiently and plan your angles before the guests arrive.

    Multi-camera framing setup in a dark industrial podcast studio with purple-red lighting

    The right setup makes the recording easier

    You do not need to overbuild a video podcast.

    You need the fundamentals in the right order:

    1. Clear voices
    2. Controlled light
    3. A backdrop with character
    4. Reliable acoustics
    5. Enough camera coverage to edit properly

    That is the value of booking a dedicated podcast studio. The technical decisions are already closer to solved. You can spend the session on the guest, the questions and the recording.

    At @38, Podcast Studio hire starts from £175 for up to 4 hours. Full-day sessions are £300 for up to 8 hours, giving you enough time to record multiple episodes, interviews and short-form content in one booking.

    Clapton · Hackney · London E5.

    You can view the Podcast Studio setup, book a half-day session, or enquire directly at at38.org. We respond within 24 hours.

    Which upgrade would make the biggest difference to your podcast : microphones, lighting, backdrop, acoustics or multi-camera framing?

    Comment below. Then DM @38 or book your session at at38.org.

  • 15 Industrial Photoshoot Backdrops You Can Shoot on Day One in a Hackney Studio (No Set Build Required)

    15 Industrial Photoshoot Backdrops You Can Shoot on Day One in a Hackney Studio (No Set Build Required)

    A good photoshoot location does some of the work before the camera comes out.

    You should not need to build a fake wall, dress a room, or spend half the booking hiding a blank studio. You need surfaces with texture. Light with direction. Corners that already have a point of view.

    That is the idea behind the main floor at @38, a raw industrial photoshoot location in London, Clapton E5.

    The space is available from £600 for a half day : up to 4 hours. You get exclusive access to the main floor, dramatic coloured lighting, track lighting, power throughout, and a studio room for talent or changing.

    No set build required.

    Here are 15 backdrops you can use on day one.

    1. Exposed brick walls

    Start with the wall that already has history in it.

    Raw brick gives portraits, fashion editorials, product campaigns, and music content a surface that a printed backdrop cannot match. Keep the light hard and directional for deep shadows. Or wash the brick with colour and let the texture do the work.

    Use it for:

    • Full-length portraits
    • Streetwear lookbooks
    • Artist press shots
    • Product close-ups
    • Editorial stills

    The brick works in both colour and black and white. That makes it useful across a full campaign.

    2. Steel beams

    Industrial structure gives your frame scale.

    Use the steel beams as vertical lines, framing devices, or strong foreground elements. Place your subject slightly off-centre. Let the beams create depth behind them.

    For a cleaner image, use a longer lens and compress the structure. For something more graphic, shoot wide and make the architecture part of the composition.

    Simple. Strong. Already there.

    3. Concrete floors

    A textured concrete floor gives you another camera angle.

    Shoot low. Use it as a foreground plane. Let the subject stand, sit, or lie directly into the surface. Concrete works particularly well with boots, tailoring, metallic styling, and product photography that needs a harder edge.

    It also gives your full-length images somewhere to go. You are not cutting the frame at the shoes because the floor becomes part of the image.

    4. Metal cage partition

    The metal cage is one of the fastest ways to add depth.

    Shoot through it for foreground texture. Put your subject behind it for a more enclosed frame. Light the cage from the side and the mesh catches the colour while the background falls away.

    Red and purple lighting push it towards a late-night, music-led look. Neutral light keeps it raw and architectural.

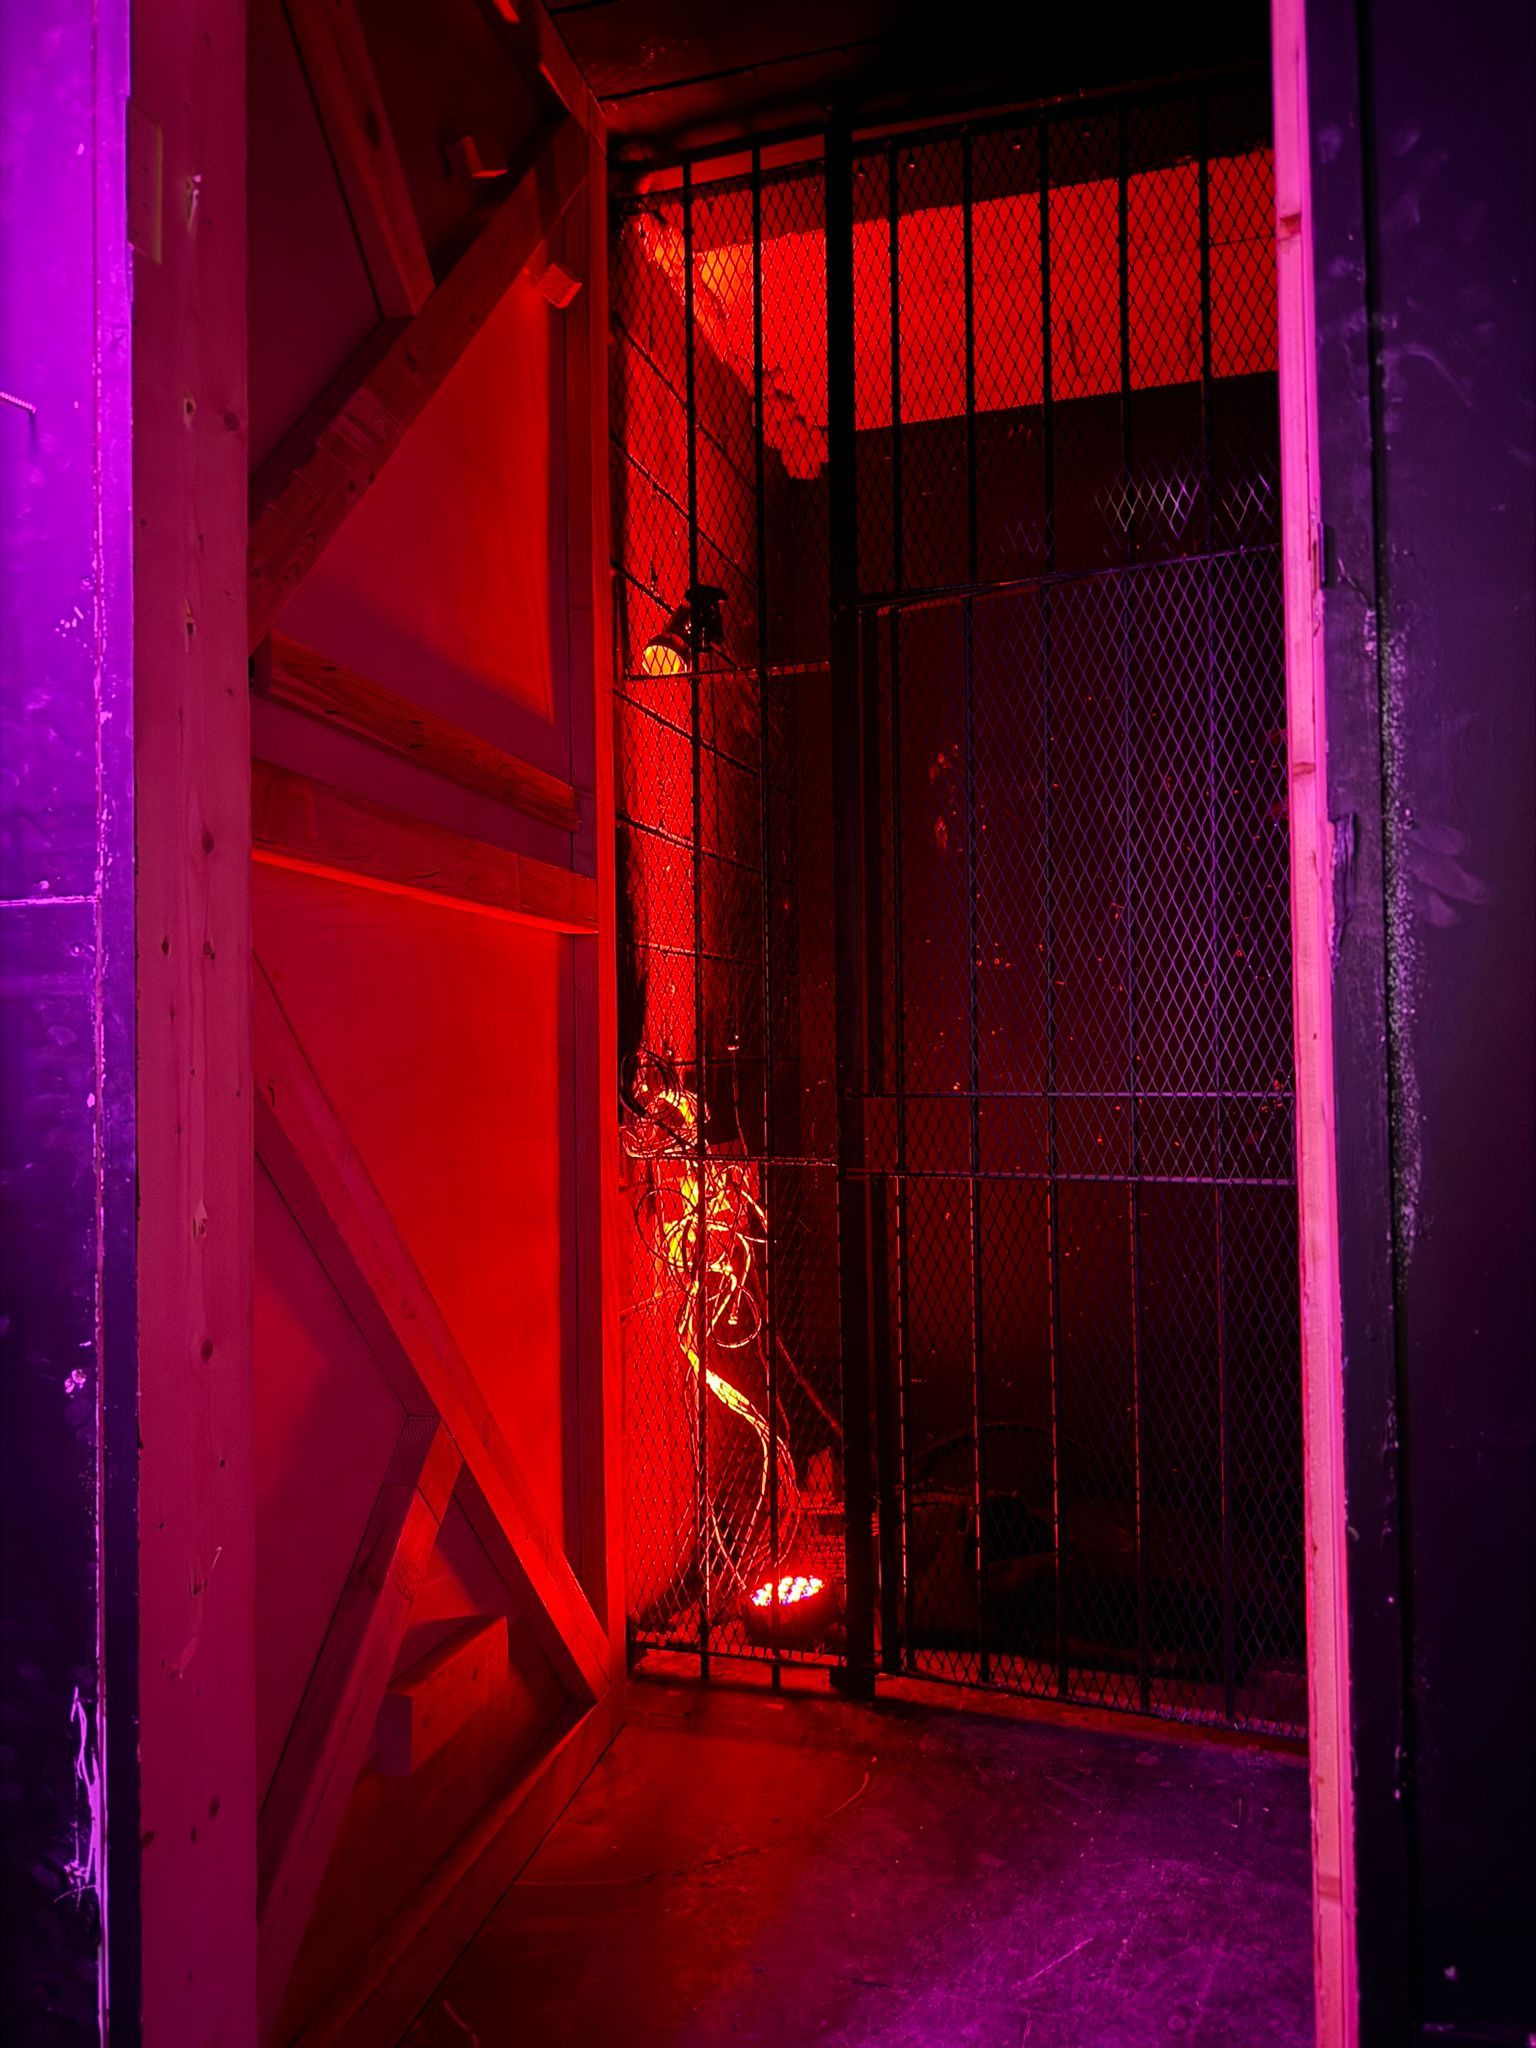
    Industrial metal cage partition lit in red and purple at @38

    5. Industrial staircase

    A staircase gives you levels, lines, and movement without moving a wall.

    Use the steps for seated portraits. Shoot from below for a more imposing frame. Place the subject at the top and use the rails to pull the eye upwards.

    The raw metal construction works for campaign stills, artist content, performance images, and short-form video. It is also useful when you need several poses from one tight area.

    Change the angle. Keep the same backdrop. You have a new image.

    6. Dark lounge corner with leather bench

    Not every industrial frame needs to feel hard.

    The dark lounge corner brings in leather, shadow, and a more intimate shape. Use the bench for seated portraits, paired talent, interview-style stills, or product shots that need a lifestyle setting.

    Keep the room dark and let one coloured source skim across the leather. The material will hold the highlight. The background will disappear.

    A good option for music artwork, fashion campaigns, and night-led brand content.

    7. Red-lit corners

    Red light changes a plain corner immediately.

    Use it for close portraits, movement, and frames with a heavier mood. Red can flatten a space if it is everywhere, so keep some areas dark. Give the eye somewhere to rest.

    Try a profile pose against the wall. Or place your subject at the edge of the light so half the face drops into shadow.

    The result feels deliberate without needing props.

    8. Purple-to-red studio lighting

    Colour gives you multiple looks in one booking.

    The lighting rig at @38 can move between purple, red, teal, and blue washes. Use purple for a cooler editorial frame. Push red into the background for contrast. Blend both across the same shot for a more atmospheric result.

    This is useful when you need a campaign to feel connected but not repetitive.

    Shoot the same styling under two colours. Change the direction of the subject. You have two distinct looks without changing location.

    9. Blue-lit DJ booth

    The DJ booth brings equipment into the image.

    Pioneer CDJ decks, turntables, mixer, monitors, and the surrounding industrial structure give you an immediate music and nightlife context. You can shoot the DJ at work, create artist portraits, or use the equipment as graphic foreground detail.

    It is also a strong backdrop for headphone, streetwear, drinks, and tech campaigns.

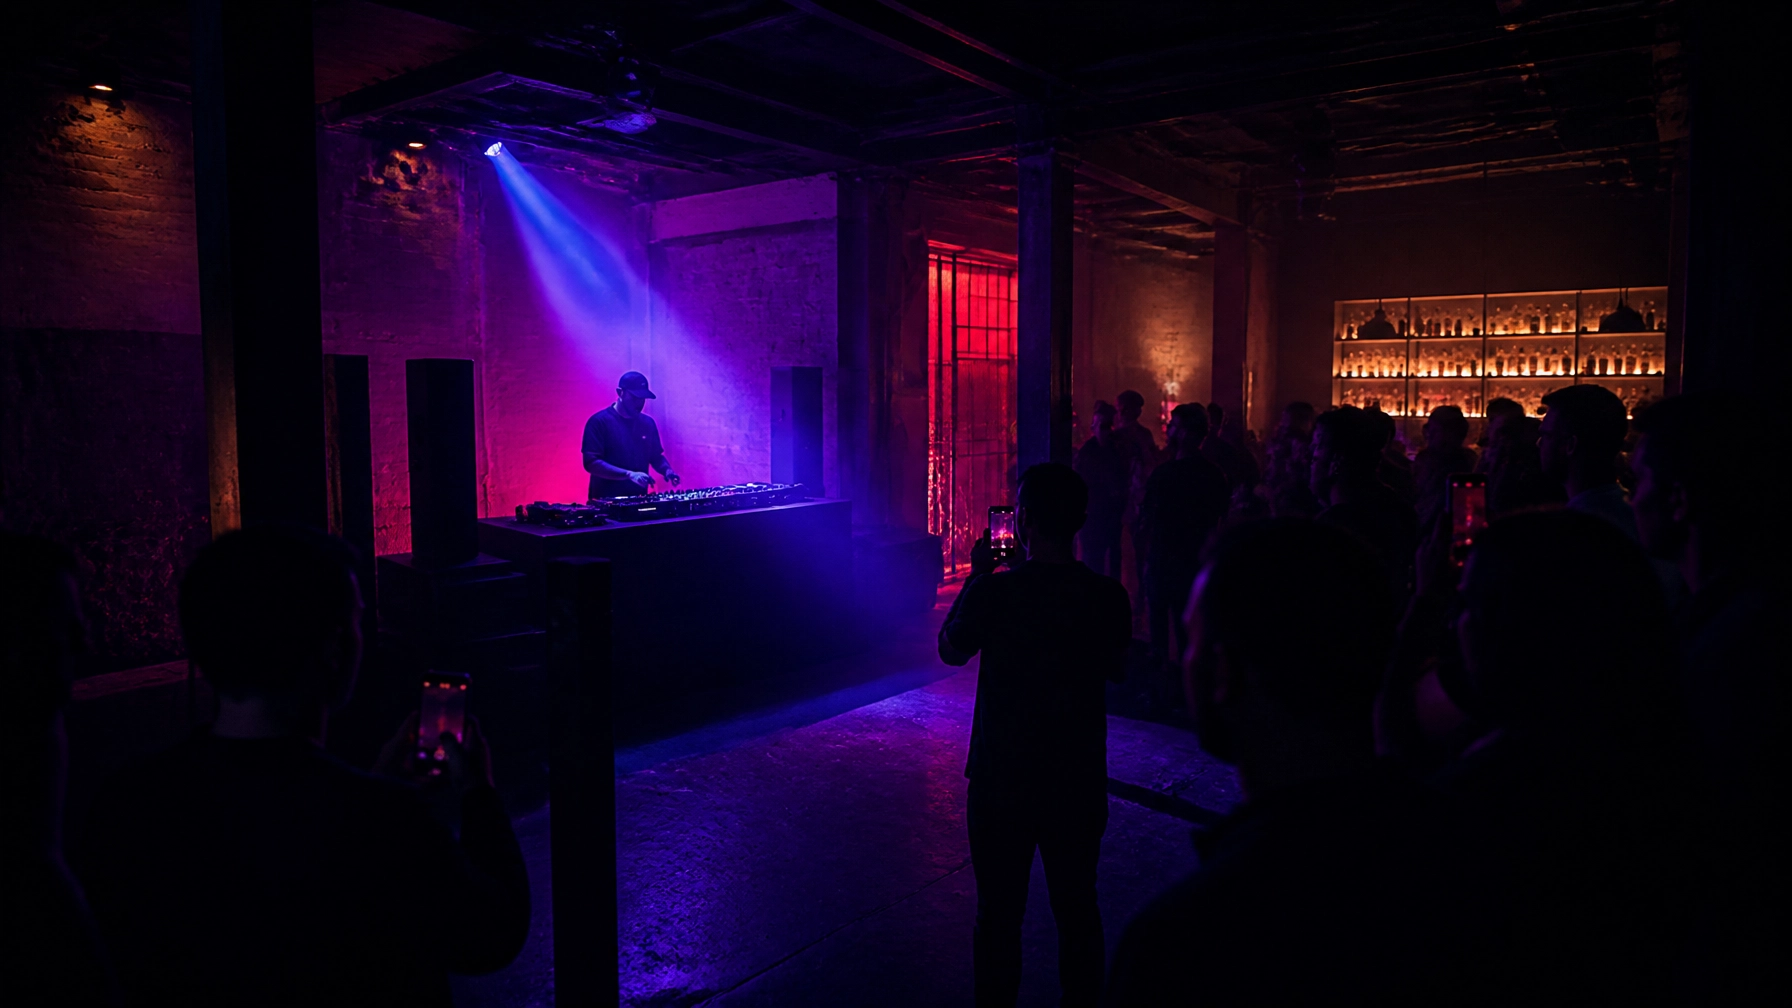
    Blue-lit Pioneer DJ booth at @38 in Hackney

    Keep the blue low and let small highlights from the equipment break through. The screens and controls will add detail without filling the frame with clutter.

    10. A-frame podcast structure

    The A-frame podcast setup gives you a clean focal point with industrial edges.

    Use the structure to frame one person or two. Bring in the microphones for a working, documentary feel. Or remove attention from the equipment and use the geometry as a strong shape behind the subject.

    This backdrop works for:

    • Founder portraits
    • Interview stills
    • Podcast artwork
    • Talking-head content
    • Culture and media campaigns

    You can book the main floor for the look, then move into the dedicated studio room if you also need controlled audio or video recording.

    A-frame podcast setup with microphones and moody blue lighting at @38

    11. Raw wooden elements

    Wood softens the metal and concrete around it.

    Use the raw wooden beams, framing, and structural details for warmer images. They work well against red light, amber tones, and neutral daylight. The grain gives close-ups more texture. The structure gives wider frames a sense of place.

    Mix wood with black clothing or reflective materials for contrast.

    The point is not to make the set look polished. Keep the marks, joins, and uneven surfaces visible.

    12. Dramatic window light

    Natural light gives the space another direction.

    Shoot when the window light is strongest, then use the darker areas of the room as negative space. Place your subject close to the light for a sharper portrait. Pull them back for a softer fall-off across the body.

    You can also combine window light with the coloured rig. Let daylight shape the face while red, purple, or blue light sits in the background.

    That contrast creates depth without extra set dressing.

    13. Warehouse ceiling

    Look up.

    The ceiling gives you a wider sense of the building and makes smaller compositions feel more expansive. Use it for wide editorial frames, group portraits, performance stills, and campaign images where the location needs to be visible.

    Exposed structure, cable runs, beams, and lighting tracks can all become part of the shot.

    Shoot from below. Use a wide lens. Keep the subject small in the frame and let the architecture carry the image.

    14. Bar area

    The bar adds a different kind of context.

    Use it for nightlife campaigns, drinks content, hospitality brands, artist portraits, and event photography. It gives you a natural place for your subject to stand, lean, sit, or interact with a prop.

    Keep the styling minimal. One glass. One bottle. One strong light. The area already gives the image enough information.

    For larger launches or branded nights, the full events space has a 170-person capacity, bar operation, DJ setup, security, and full-colour lighting rig.

    15. Mixed metal and timber textures

    The strongest frames often combine more than one surface.

    Pair metal with timber. Concrete with brick. Dark leather with red light. Use the difference between hard and soft textures to create visual tension.

    This approach is useful when one backdrop needs to support a full shoot day. You can keep the same overall industrial language while changing the frame through:

    • Camera height
    • Lens choice
    • Lighting colour
    • Subject position
    • Styling
    • Texture in the foreground

    That is how you get more output without building more sets.

    How to plan a shoot at an industrial photoshoot location in London

    Bring the kit you need, but do not overpack the set.

    Start with three planned looks:

    1. A raw daylight setup
    2. A coloured lighting setup
    3. A darker, close-up setup using leather, metal, or the DJ booth

    Then build variations inside each one.

    Change the subject’s position before changing the backdrop. Move from standing to seated. Shoot wide, mid, and close. Capture stills and short-form video while the lighting is already set.

    The main floor has power throughout, track lighting for your own kit, parking by arrangement for equipment vans, and a studio room for talent or changing. Access is available from 08:00, Monday to Sunday. Your booking is exclusive.

    You can also use both spaces through a content day booking, switching between the raw industrial main floor and the cleaner studio room on the same day.

    Book the backdrop. Not the build.

    If you need a photography studio Hackney can offer without the blank-box problem, @38 gives you the surfaces, structure, and lighting to start shooting straight away.

    Main floor shoot hire: from £600 for a half day : up to 4 hours.
    Location: Clapton E5.
    Full-day hire: £1,100 for up to 8 hours.

    Visit at38.org to check the space, or book a shoot day. We respond within 24 hours.

    Which backdrop would you shoot first : the cage, the staircase, the DJ booth, or the red-lit lounge? Comment below and tell us. Then DM us or book at at38.org.

  • One Space, Six Creative Uses: The Complete @38 Service Breakdown

    One Space, Six Creative Uses: The Complete @38 Service Breakdown

    One address. Six ways to use it.

    @38 is a raw industrial creative space in East London for people making something with sound, vision or light. Podcast recordings. DJ sets. Interviews. Brand events. Fashion shoots. Full content days.

    No white box. No long set build. No moving between three different studios to get one day’s work done.

    You’ll find us in Clapton E5, Hackney. The space is built around two distinct environments: a 170-capacity industrial main floor and a dedicated studio room with controlled acoustics. Book one, or use both.

    The quick breakdown

    • Podcast @38: From £175 for up to 4 hours in the studio room
    • DJ @38: From £600 for up to 4 hours on the main floor
    • Studio @38: From £175 for up to 4 hours
    • Events @38: From £2,500 for an evening or weekend event
    • Shoots @38: From £600 for up to 4 hours on the main floor
    • Content @38: From £175 for up to 4 hours, with both spaces available

    Every booking is exclusive. Your crew, your equipment, your session. No other clients walking through the background.

    Here’s what each service is built for.

    1. Podcast recording

    Record here. Sound like this.

    The podcast room is a dedicated studio built for long-form conversations, solo shows and panel recordings.

    You get twin broadcast-quality boom-arm microphones, two Wassily chairs, controlled acoustics and adjustable purple-to-red studio lighting. The room is visually finished before you arrive, so the background already has a point of view.

    Podcast recording setup with Wassily chairs and moody purple and red lighting

    The room is independent from the main floor. That means no bleed from a DJ session, event setup or production crew elsewhere in the building.

    Use it for:

    • Interview podcasts
    • Solo recordings
    • Round-table discussions
    • Video podcasts
    • Voiceover and branded audio
    • A series of episodes recorded in one session

    The half-day rate starts at £175 for up to 4 hours. A full-day session is £300 for up to 8 hours, giving you enough time to record multiple episodes, cut short-form clips and reset between guests.

    If you’re building a regular series, ask about recurring bookings and monthly blocks.

    Book Podcast @38

    2. DJ sessions

    Your setup. Our stage.

    The main floor holds a professional Pioneer DJ setup, turntables, a professional mixer, full PA and monitor system.

    Bring your set. Bring your crew. The core rig is already in the room.

    Professional Pioneer CDJ and turntable setup in the @38 industrial DJ space

    The space works for private rehearsals, recorded mixes, live DJ streams and filmed performances. The atmospheric lighting rig gives you red, purple, teal and blue washes without needing to build a visual environment from scratch.

    There’s also a viewing window from the adjacent room, which gives your camera team a useful angle for livestreams and performance content.

    Use it for:

    • DJ rehearsals before a show
    • Recorded mixes
    • Live radio or livestream sessions
    • Brand-led DJ content
    • Music videos
    • Private sets with a small audience

    DJ hire starts at £600 for up to 4 hours. A full-day booking is £1,100 for up to 8 hours.

    The main floor has a 170-person capacity, so the same setup can scale from a solo recording session to a full event night.

    Book the DJ Setup

    3. Studio recording

    Clean sound. Controlled space.

    Podcast @38 is designed around conversation. Studio @38 is the wider recording room for interviews, livestreams, corporate video, voiceover and media production.

    It’s a self-contained space with controlled acoustics, separate from the main floor. You can bring your own set elements, cameras and production team, then work without the noise and movement of a shared venue.

    Use the studio for:

    • Brand interviews
    • Livestreams
    • Corporate video
    • Talking-head content
    • Voiceover sessions
    • Media and broadcast production
    • Multi-camera recording

    The studio room starts at £175 for up to 4 hours. Full-day access is £300 for up to 8 hours.

    The difference between this and a standard meeting room is simple: the room is designed to be recorded in. The acoustics are controlled. The background has structure. The access is private.

    You can also combine the studio with the main floor. Record the interview in the controlled room, then move to the industrial floor for launch content, stills or performance footage.

    Book Studio @38

    4. Events

    Your night. All in.

    @38 is a warehouse event space in London with a 170-person capacity across two distinct environments.

    The event package includes the parts that usually require several suppliers: full bar operation, venue staffing, security, professional Pioneer DJ setup and atmospheric lighting.

    Industrial lounge and bar area with blue lighting, ready for an event or brand gathering

    The full venue is exclusive to your event. No shared areas. No other booking competing for the room. One contact for the venue, production and core event setup.

    Use it for:

    • Club nights
    • Brand launches
    • Private parties
    • Creative industry events
    • Listening parties
    • Networking events
    • Product activations
    • Music-led gatherings

    Event nights start at £2,500 for an evening or weekend booking. That includes the bar, staffing, DJ setup, security and full venue exclusivity.

    Bring your crowd, DJs and creative direction. @38 handles the venue infrastructure.

    Check Your Date

    5. Photo and video shoots

    The set you couldn’t build.

    The main floor gives you raw brick, dark wood, industrial structures and dramatic coloured lighting. These surfaces read on camera immediately.

    Raw industrial metal structure and coloured lighting inside @38

    This is the right environment when a clean white studio feels too neutral, or when building a set would take half your budget and most of your day.

    The space works for:

    • Fashion campaigns
    • Portraits
    • Editorials
    • Product photography
    • Lookbooks
    • Music videos
    • Brand films
    • Press imagery
    • Social-first video

    You also get track lighting, power throughout and access to the studio room for talent holding, changing or a second visual setup.

    Shoot hire starts at £600 for up to 4 hours. A full day is £1,100 for up to 8 hours. Parking for equipment vans is available by arrangement.

    The main advantage is speed. Arrive with your kit. Choose your angle. Start shooting.

    No set build required.

    Book a Shoot Day

    6. Content creation days

    More output. One booking.

    Content @38 is for creators, brands and teams who need more than one format from the same production day.

    Use the raw industrial main floor for high-impact video and stills. Move into the studio room for interviews, voiceover or controlled audio. Change the lighting, furniture and camera position between takes.

    Two environments. One booking.

    Atmospheric @38 lounge setup with purple lighting and industrial ceiling details

    A content day can include:

    • YouTube video
    • Short-form social clips
    • Podcast episodes
    • Brand interviews
    • Product stills
    • Behind-the-scenes footage
    • Campaign photography
    • DJ or music content
    • Thumbnail and cover images

    Content bookings start at £175 for up to 4 hours, with both spaces available depending on your brief. For larger productions, ask about a full-day or combined booking.

    The useful part is not just the number of rooms. It’s the change in visual language. You can shoot the energetic, industrial material on the main floor, then move into the studio for a quieter interview. Your content feels connected without looking repetitive.

    For a practical workflow, start with the most technical setup first. Record interviews while the crew is fresh. Shoot your main-floor video next. Finish with stills and short-form assets while the lights and equipment are already in place.

    Plan a Content Day

    One space. Different briefs.

    The point of @38 is flexibility without the blandness.

    You can book the space as a podcast studio, a DJ stage, a recording room, a warehouse event space, a shoot location or a full content production base. The raw industrial character stays consistent. The use changes around your brief.

    That makes @38 useful when your project needs more than one output:

    • A podcast series with launch photography
    • A DJ livestream with behind-the-scenes footage
    • A brand event with campaign content
    • A fashion shoot with interview material
    • A full content day across audio, video and stills

    You don’t need to force one room to do everything. You can move between spaces that are each built for a different job.

    Clapton · Hackney · London E5.

    We respond within 24 hours.

    Which service would you book first?

    Podcast. DJ. Studio. Events. Shoots. Content.

    Tell us what you’re making in the comments below and which @38 service you’d book first. Then DM us to check your date and we’ll help match the space to the brief.

    Start with @38

  • How to Turn a Warehouse Event Space in London Into a Brand Activation People Film on Their Phones

    How to Turn a Warehouse Event Space in London Into a Brand Activation People Film on Their Phones

    A brand activation should not end when the guests leave.

    The room is only the first channel. The second is every phone pointed at it.

    In 2026, the strongest activations are built for both: the people in the space and the people watching later. Content capture is no longer something you add after the set design is finished. It shapes the venue, the lighting, the layout and the guest journey from the start.

    That is why brands are moving away from transactional venues and towards culture-led spaces with a point of view.

    A warehouse event space in London gives you a head start. Exposed brick. Concrete. Steel. Shadow. Room for sound, light and movement. The venue already has texture before you add a single branded panel.

    Here is the five-step playbook.

    1. Pick a space with built-in texture

    Start with the room.

    Not the logo wall. Not the welcome desk. The room.

    A conventional venue often needs a full set build before it feels like anything. That adds cost, production time and another layer of visual noise. A raw industrial venue gives you a stronger base from the first frame.

    Look for:

    • Exposed brick or concrete
    • Dark industrial surfaces
    • Steel beams, staircases or cage structures
    • Distinctive corners that work as backdrops
    • Clear sightlines for vertical video
    • Enough floor space for guests to move without blocking the shot
    • A venue that can hold sound, lighting and production without feeling crowded

    Texture does useful work on camera. It creates depth behind the subject. It gives a simple product display, performance or portrait more visual weight. It also helps your activation feel less like a temporary installation.

    The goal is not to hide the warehouse. Use it.

    Keep the hard surfaces. Work with the shadows. Add brand colour through light, projections, furniture and selective graphics rather than covering every wall.

    At @38 in Clapton E5, the full venue has two connected spaces and capacity for up to 170 people. The dark industrial surfaces are already there. No set build required for the base look.

    Raw industrial wall and coloured lighting designed for phone-first brand content

    Make the venue part of the campaign

    The venue should contribute more than square footage.

    Its look becomes part of the content. Its equipment affects the experience. Its audience and cultural position can influence how the event is understood.

    This is one of the shifts identified in recent experiential marketing research from UNLOCKED: brands are choosing venues that bring their own character and credibility, not just four walls and a capacity number.

    Before booking, ask:

    • Does the space look recognisable in a feed?
    • Can it hold the production you need?
    • Are there several visual zones rather than one empty room?
    • Can the guest journey move from arrival to interaction to a clear finale?
    • Is the venue flexible enough for your brand without losing its identity?

    A strong venue gives you a visual language. Your job is to add the brand without flattening it.

    2. Light for the camera, not the room

    A room can look good in person and fail completely on a phone.

    Bright overhead lighting can make an industrial space feel flat. Deep, unplanned shadows can lose faces and products. Coloured lights can clip, flicker or turn skin tones into strange digital gradients.

    Test the room through the camera before the event.

    Use a phone in vertical mode. Walk the route your guests will take. Film the DJ booth, the product display, the bar, the entrance and the main interaction. Check what is visible in the frame. Check what disappears.

    A few practical rules:

    • Use colour to guide attention, not cover every surface.
    • Keep key subjects separated from the background.
    • Add a soft front light where people will speak or interact.
    • Avoid strong light sources directly behind the subject.
    • Test magenta, cyan, red and amber at the same exposure your guests will use.
    • Leave enough shadow to create depth.
    • Check for LED flicker on several phone models.

    Phone cameras respond well to contrast, but they need a clear subject. Give people one.

    At @38, the event package includes a full atmospheric lighting rig with purple, teal, red and blue options. The lighting should support your brand palette and create several looks across the room, rather than turning the whole venue into one colour.

    3. Plan a content capture moment

    Do not hope that people will find the moment.

    Build it.

    Every activation needs one clear, repeatable scene that people understand instantly. It could be:

    • A live product reveal
    • A DJ performance with a lighting change
    • A branded projection triggered by guest movement
    • A customisation station
    • A surprise performance
    • A group ritual, toast or countdown
    • A limited drop revealed at a specific time

    The moment should be easy to film. It needs a strong beginning, a visual change and a clean finish. Thirty seconds is enough if the sequence is clear.

    Think vertically.

    A phone is usually held upright. Place the key action in a frame that works at 9:16. Keep important details away from the extreme edges. Leave room for people to stand back and capture the full scene.

    Then give guests more than one angle. A DJ booth can be filmed from the crowd, from the side or from behind the decks. A product reveal can work as a close-up, a reaction shot and a wide room moment.

    One hero shot gets attention. Several connected moments create a story.

    Guests capturing a live DJ performance in a dark industrial event venue

    4. Build the guest experience around sharing

    People share experiences that give them something to say.

    “Here is a branded wall” is not much of a story.

    “I found this hidden room.”
    “The lights changed when the track dropped.”
    “They let us customise it.”
    “That DJ set was filmed live.”
    “The whole bar was serving drinks in the campaign colour.”

    Design the event around discovery, participation and movement.

    Give people reasons to use their phones without making the event feel like a content farm.

    You could:

    • Place a product or installation in a space guests discover gradually.
    • Use a QR code to unlock a track, filter, discount or hidden piece of the story.
    • Add a live visual feed showing selected guest content.
    • Create a limited-edition item that can only be collected at the event.
    • Invite a local artist, DJ or creator to shape the programme.
    • Give guests a clear handle and hashtag at the point where they are most likely to post.
    • Offer staff guidance on the best filming positions.

    The best prompts are useful, not desperate.

    “Film this angle.”
    “Scan to unlock the next room.”
    “Tag us for the full set.”
    “Post your version.”

    Keep the language short. Put it where people need it.

    A full bar also helps shape the experience. It gives guests a reason to stay between programmed moments and creates another opportunity for colour, product placement and social interaction. At @38, the events package includes a staffed full bar, venue staff, security and a professional Pioneer DJ setup with CDJs, turntables and mixer.

    That means your production team can focus on the activation rather than coordinating ten separate suppliers.

    5. Leave them wanting the follow-up

    The event is not the finish line.

    It is the first release.

    If the audience sees everything in one night, the story closes when the doors do. Give them a reason to keep watching.

    Plan the follow-up before the activation opens:

    • Release a fast edit within 24 to 48 hours.
    • Share behind-the-scenes footage from the build and soundcheck.
    • Post the full DJ set or a selected performance clip.
    • Repost guest content with permission.
    • Reveal the next product, date or collaboration.
    • Send attendees a private link, discount or early-access invitation.
    • Turn the event into a short content series rather than one recap post.

    A 2026 activation should be designed as a platform, not just a single photograph. Forte Events’ guide to London brand activations makes the same point: the physical event is the catalyst, while the content, data and follow-up create the longer-term value.

    Capture the basics while you are there:

    • Attendance
    • Email sign-ups
    • QR scans
    • Social mentions
    • Content volume
    • Video views
    • Product trials
    • Dwell time
    • Follow-up engagement

    You do not need to turn the night into a spreadsheet. You do need to know whether the activation moved people towards the next action.

    A practical London warehouse activation checklist

    Before you confirm a warehouse event space in London, check:

    The room

    • Does the venue have built-in texture?
    • Are there at least two or three usable visual zones?
    • Can guests move without interrupting filming?
    • Does the space look strong without a full set build?

    The camera

    • Have you tested the lighting vertically?
    • Is there a clear hero moment?
    • Can guests capture it from more than one angle?
    • Are key products, faces and signs visible?

    The experience

    • What does a guest discover first?
    • Where do they participate?
    • What makes them stay?
    • What will they tell someone the next day?

    The operation

    • Who runs the bar?
    • Who handles security?
    • Who manages the door and guest list?
    • Is the DJ setup included?
    • Are staffing and lighting covered in the quote?

    The follow-up

    • What goes live first?
    • Who edits the footage?
    • How will you collect permission to repost?
    • What is the next reason for the audience to engage?

    Use the room. Build the moment.

    An industrial event space in London does not need to be polished into something generic.

    The rawness is the asset.

    Choose a venue with a strong base. Light it for the phone. Give guests something worth filming. Make sharing useful. Then keep the story moving after the last track.

    At @38, full event hire starts from £2,500 for an evening or weekend. That includes the venue, full bar operation, staffing, security, professional DJ setup, atmospheric lighting and full exclusivity. Capacity is up to 170 people.

    Clapton · Hackney · London E5.

    Have a brand activation idea that people would actually film? Comment below and tell us what it is. Then DM @38 or check the date at at38.org. We respond within 24 hours.

    Guests staying, sharing and connecting around the bar after a warehouse brand activation

    The @38 industrial event space with bar area and blue atmospheric lighting