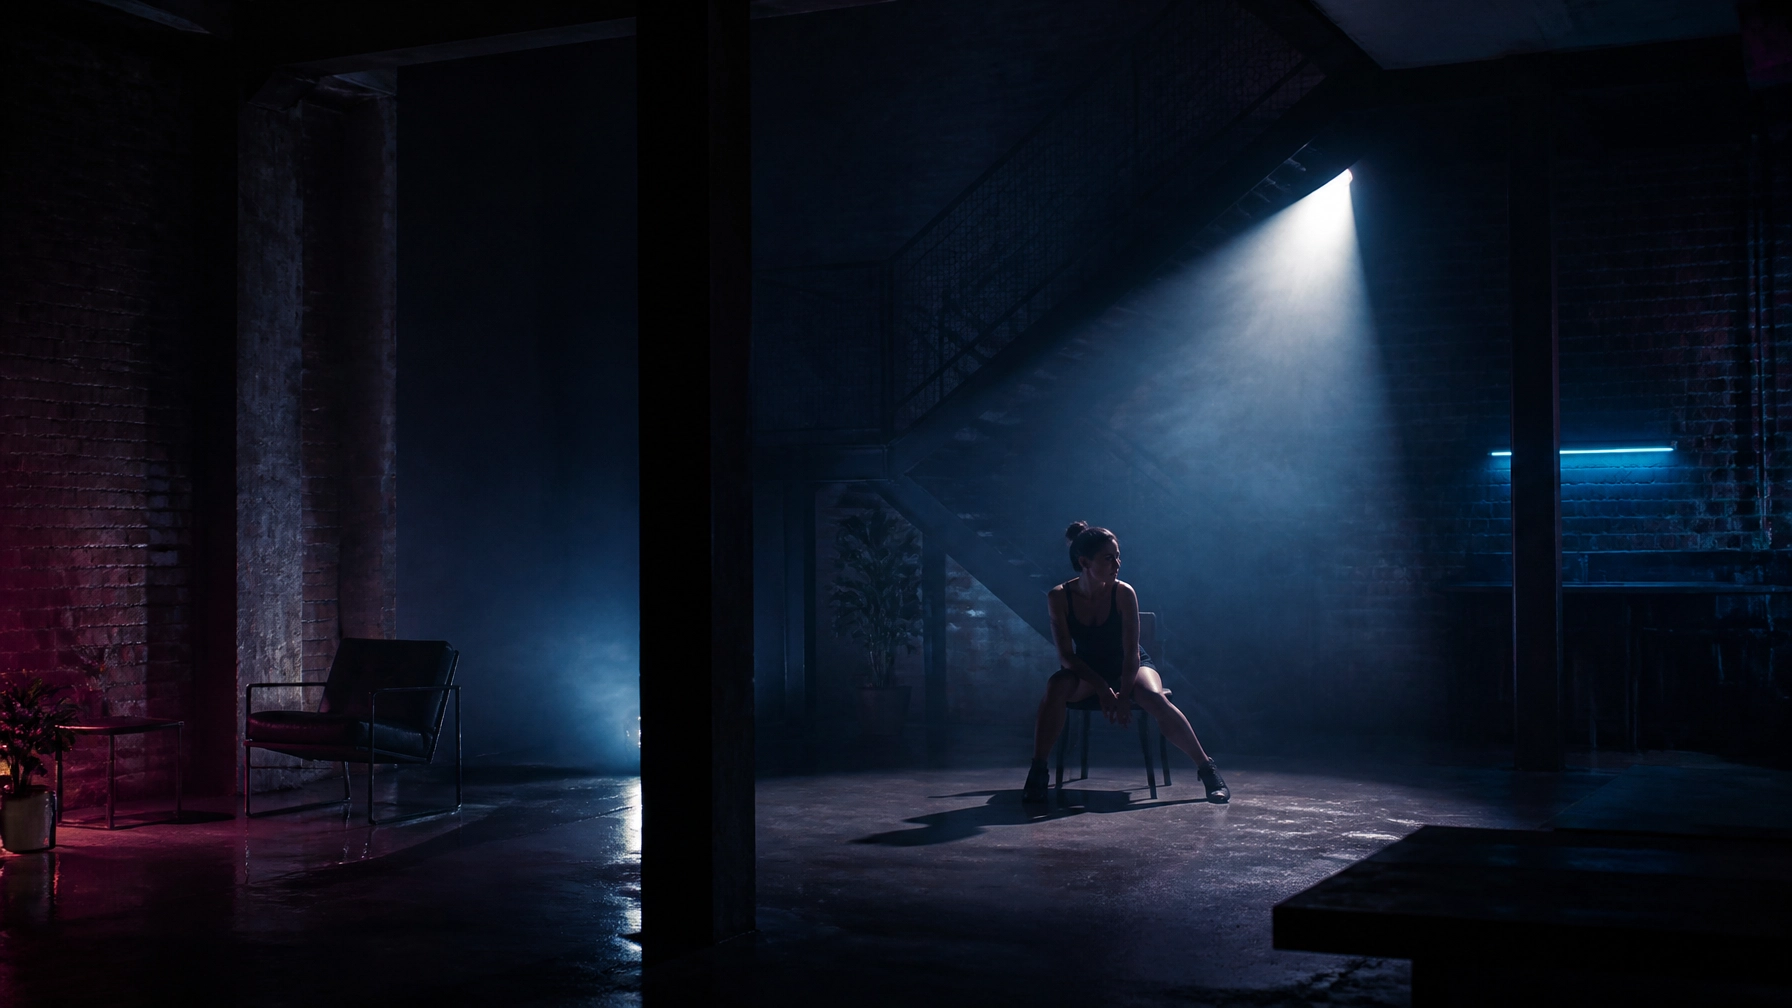
You do not need five lights to make an industrial shoot work.
You need one controlled source. A strong location. A subject that can hold a frame.
At @38, the backdrop is already there: exposed brick, steel structure, dark surfaces, a DJ booth, leather seating and dramatic colour. No flats. No paper rolls. No four-hour set build before the first test shot.
This is a practical starting point for a photography studio in Hackney. Five one-light setups. Five different looks. All shootable on day one.
Shoots at @38: Half day, up to 4 hours, from £600 on the main floor.
Location: Clapton E5.
Response: We respond within 24 hours.
Start with one light. Keep the room dark.
The mistake is trying to light the entire space.
Industrial locations work because of contrast. Let the background fall away. Light the face, hands, product or key detail. Keep the rest in shadow.
Bring one LED, strobe or flash with a softbox, reflector or bare head. You can change the look by moving the light, not by adding more equipment.
A few starting points:
- Place the light 45 degrees from the subject for a classic portrait shape.
- Move it closer for more contrast and softer fall-off.
- Move it further away for a wider, more even spread.
- Turn down the ambient exposure before raising the light.
- Shoot RAW if you are mixing daylight, LEDs and practical sources.
- Use a black flag, board or the architecture itself to stop unwanted spill.
If you are working with coloured practical lighting already in the room, do not fight it. Let the industrial environment provide the atmosphere. Your single source only needs to give the subject enough shape.
For more location advice, see our guide to 7 industrial photoshoot mistakes and how to fix them.
1. The red corner portrait
One light against exposed brick.
Start with the red-lit corner.
Put your subject close to the exposed brick, then place the light just outside the frame at 45 degrees. Keep it slightly above eye level. Angle it across the face rather than directly into it.
The red environment gives you the mood. The single light gives you the skin detail.

The look
This is the cleanest setup for:
- Portraits
- Artist press images
- Fashion tests
- Album artwork
- Campaign stills
- Social profile content
Keep the light tight. You want the face and upper body to read, while the edges of the frame drop into red and black.
Try short lighting by turning the subject slightly away from the source. The side of the face nearest the camera falls into shadow. The brick catches a small amount of side light and gains texture.
Do not fill the corner evenly. That removes the depth.
Quick adjustment
Move the subject 30 centimetres away from the brick. The background will soften slightly, while the wall still gives you enough texture to establish the location.
For a harder editorial look, use a smaller source or remove the diffusion. For softer skin, move the light closer and increase its apparent size.
No gels required. The room is already doing the colour work.
2. The steel beam silhouette
Backlight through the structure.
Industrial architecture is useful because it creates lines.
Place your subject between the camera and a brighter section of the space. The steel structure, gantry or metal staircase becomes the frame. Put your one light behind the subject, slightly to one side, and expose for the brighter area behind them.

The look
This gives you a silhouette with a clean edge.
Use it for:
- Full-body fashion shots
- Dance images
- Music artwork
- Movement tests
- Artist portraits
- Brand statements
The key is not to make the subject completely disappear. Leave a narrow rim of light along the shoulder, hair, hands or jacket. That small separation is what keeps the frame legible.
Start with the background one or two stops underexposed. Then bring the light around until it catches the edge of the subject.
Ask the subject to move slowly. A turn of the head or a raised arm changes the shape of the silhouette. You can shoot a full series without moving the light.
Quick adjustment
For a stronger graphic frame, place the subject directly under a beam or inside a structural opening. Keep the camera low and let the vertical lines rise through the image.
For a softer result, shift the light further behind the subject and allow a little detail into the front of the body.
The building becomes the set. You only need to decide where the body sits inside it.
3. The window-light editorial look
Dramatic window light. One source to control the contrast.
Use the window as the first light. Your additional light is there to shape the subject, not overpower the room.
Place the subject near the window, turned 45 degrees away from it. Expose for the window or the brightest part of the scene. Then bring your one light in from the opposite side at low power.

The look
This creates a split between cool natural light and the deeper tones inside the space.
It works well for:
- Editorial portraits
- Beauty and skincare
- Fashion lookbooks
- Interview stills
- Product-led brand images
Keep the window side brighter. Let the single light open just enough detail on the shadow side of the face.
You are balancing two exposures:
- The darker industrial room.
- The brighter window and subject.
Start in manual mode. Keep the ISO low if the ambient level allows. Choose an aperture that gives you enough depth for the pose and styling. Then adjust the shutter speed to control how much of the room comes back into the frame.
Quick adjustment
For a more cinematic frame, underexpose the room and let the subject sit between light and shadow.
For a commercial look, raise the one light until the face is clear but the window still has shape. Do not let the fill become flat.
If the daylight and practical lights are different colours, shoot RAW and make the mismatch part of the image. Industrial editorial work does not need to look clinically neutral.
4. The blue booth music shot
One light on the DJ booth.
The booth is already a visual anchor. Pioneer decks, turntables, mixer controls and steel structure give the frame information before you add anything.
Place your subject behind or beside the booth. Position the single light from the front-side, aimed at the face and hands. Keep the light narrow enough that the background stays blue and dark.

The look
This is built for:
- DJ press shots
- Live-stream thumbnails
- Release campaigns
- Artist announcement images
- Behind-the-scenes content
- Music brand work
Ask the subject to work the controls. Hands on the mixer. One hand on the headphone. A turn towards camera between movements.
The light should reveal the person and the important hardware. It does not need to illuminate every cable or wall.
Let the blue ambient light sit in the shadows. It gives the image its context without turning the setup into a product catalogue.
Quick adjustment
Shoot one frame wide to show the structure. Then move in tight for the hands, jog wheels and face.
Change the angle before you change the lighting. A low camera position makes the booth feel larger. A position just over the deck gives you the controls in the foreground and the subject behind them.
Book the DJ setup if you need the equipment as part of the shoot. Use the booth as a working set, not a prop.
5. The purple lounge mood
Single source on the leather bench.
Finish on the leather bench.
Place the subject seated or leaning forward. Put the light close to one side, just outside the frame. Feather it across the body so the face, hands and leather catch the strongest part of the source.

The look
This is the slower, more intimate setup.
Use it for:
- Artist portraits
- Interview stills
- Campaign detail shots
- Jewellery and fashion
- Founder profiles
- Night-time social assets
Leather holds a highlight. Purple light holds the background. The one source gives you the shape across the subject.
Keep the pose simple. Sitting. Leaning. Looking away. Hands resting on the knees. You do not need to over-direct it.
Let one side of the bench disappear into shadow. That is where the mood comes from.
Quick adjustment
Move the light lower for more shape across the face and torso. Raise it slightly for a cleaner portrait.
Pull the subject away from the background if you want more separation. Push them closer if you want the purple light to wrap around the outline.
This setup is useful when you need several looks in one booking. Change the wardrobe, lens and pose. Keep the light in place. You have a new frame without rebuilding the room.
One booking. Five usable looks.
A half day gives you enough time to work through all five setups without turning the shoot into a production exercise.
A simple order:
- Red corner portrait while the team is fresh.
- Steel beam silhouette for movement and full-body frames.
- Window-light editorial look for softer detail.
- Blue booth music shot for performance content.
- Purple lounge mood for the final close-up portraits.
Bring one light. A few modifiers. Gaffer tape. Wardrobe changes. Your camera.
The main floor at @38 is ready for the rest.
Half day, up to 4 hours: from £600.
Clapton · Hackney · London E5.
No set build required.
We respond within 24 hours.
Which setup would you try first: the red corner portrait, the steel beam silhouette, the window-light editorial, the blue booth or the purple lounge?
Comment below and tell us. Then DM @38 or book your shoot.
Leave a Reply