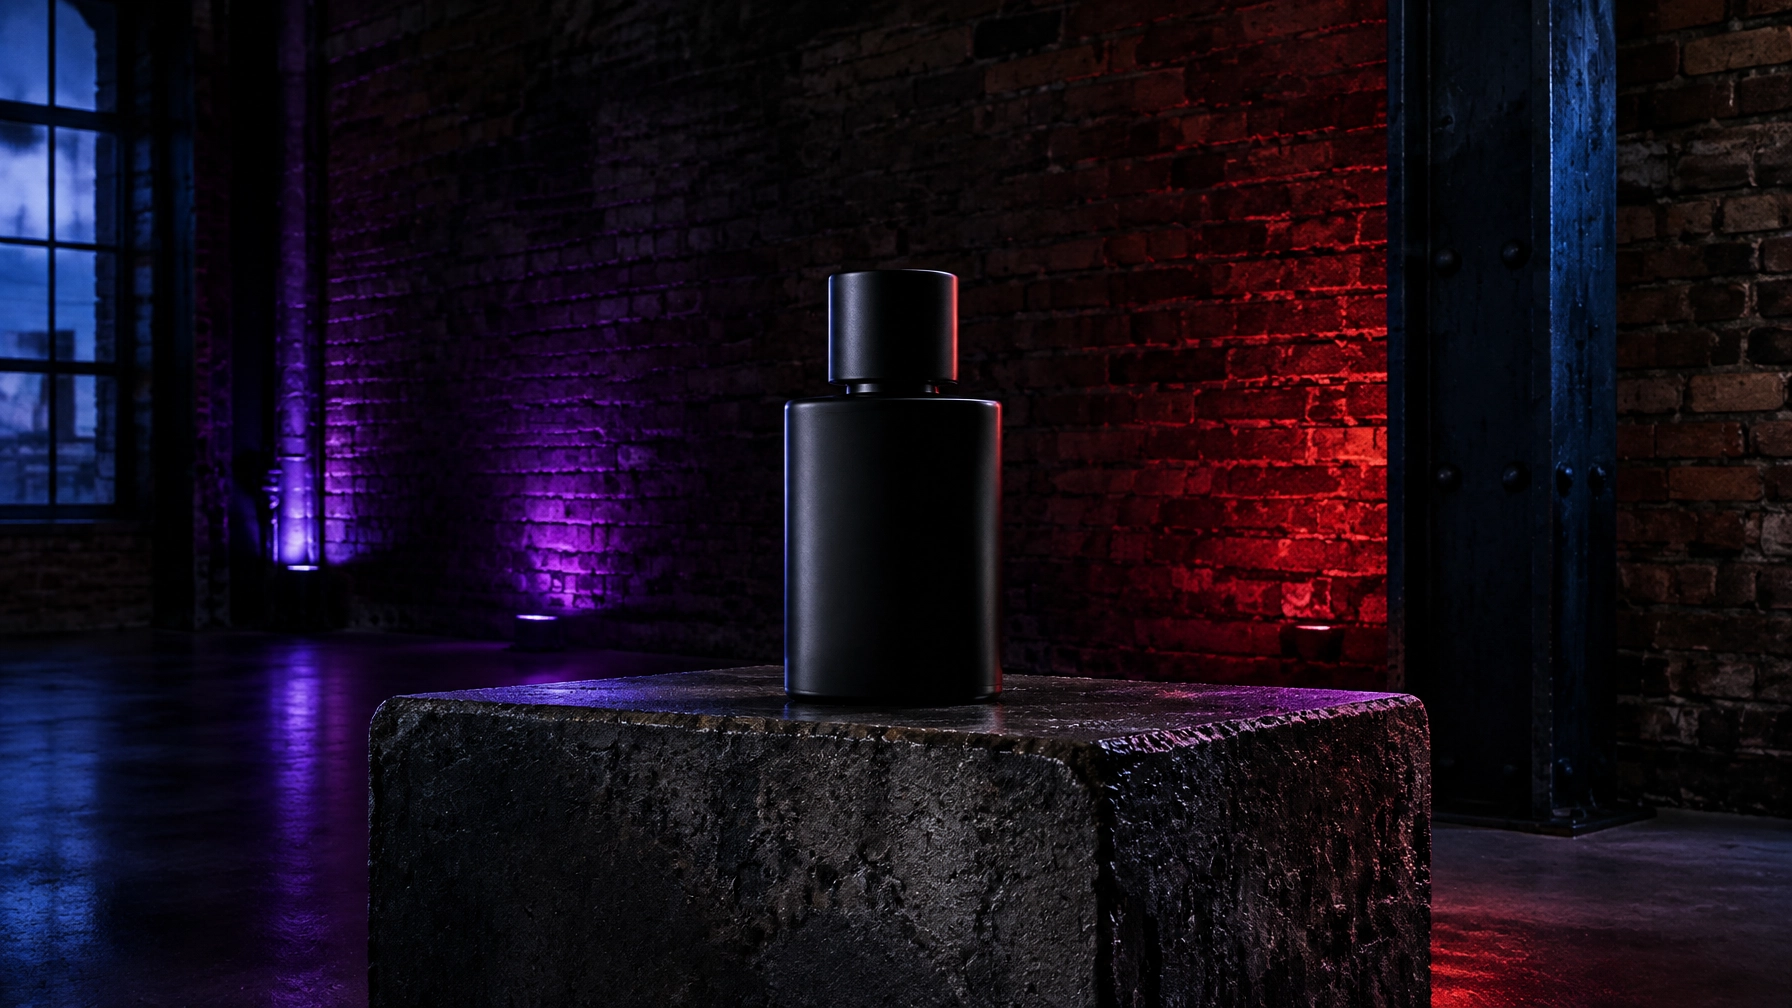
A product shoot doesn’t have to start with a white infinity cove. Raw concrete, exposed brick and steel can give your images texture before you add a single prop.
At @38, you can shoot against dark industrial surfaces with atmospheric purple, red or blue lighting already in the space. No set build required. Just bring your product, your team and a lighting plan.
Based in Clapton · Hackney · London E5, @38 offers shoot bookings from £175 for up to 4 hours and from £600 for a shoot day. See the shoot space and booking details.
Let the surface do some of the work
A white background gives you a clean starting point. Concrete gives you a starting point with character.
Use a concrete floor or plinth to bring weight and texture to a product shot. Set a piece of skincare, footwear, tech or packaging against exposed brick for a rougher frame. Add steel when you want a harder, sharper edge. These surfaces create contrast with polished packaging, clean product shapes and carefully placed props.
Keep the composition deliberate. Pick one hero product. Give it space. Use a slab or plinth to raise it from the floor, then decide where the texture should sit in the frame. A strong surface can carry a shot without crowding it.

Make texture part of the composition
Texture works best when it helps you look at the product, not away from it.
Start by placing the product where the surface changes the image in a useful way. A rough concrete edge can anchor a compact object. A brick wall can give packaging a sense of scale. A steel detail can echo a product’s material or shape.
Then look at your shadows. A single controlled light can pull out the grain in concrete and create a clean cast shadow. Move it a little at a time. Watch how the shadow shifts across the surface, and whether it makes the product feel grounded or just obscures it.
You can also use the space’s coloured lighting to add atmosphere. Purple, red and blue light can work well on a background or surface in a campaign image. Keep it off product details that need accurate colour. For colour-sensitive work, light the product neutrally and bring the coloured wash in around it. Check a test frame before the full shoot.
Glossy products need controlled reflections
Glossy packaging, glass, chrome and polished plastic reflect whatever is around them, including your lights, walls and crew. In a dark industrial room, that can be an advantage. It can also turn into a series of distracting highlights if you don’t shape what the product sees.
Start with a large, diffused source. It creates a broader, smoother highlight than a small bare light. Then add white cards to lift the dark side of the product, or black cards to create a controlled dark edge. Move them while watching the reflection through your camera. Small shifts can change the shape of the highlight.
Separate the product from the background where you can. Keep background light from spilling across the object, and flag light that’s creating unwanted glare. The aim isn’t to remove every reflection. It’s to make the reflections work for the shot.
For a deeper technical walkthrough, read this guide to photographing reflective products. It covers the same basic principle: shape the reflections rather than simply adding more light.

Build contrast without losing the product
A dark backdrop can give your product image depth. It can also swallow the product if its tone is too close to the wall or floor.
Look for separation. A pale label against dark brick. A light edge along a black object. A distinct shadow under the product. Use a soft side or rear light to define the product’s outline, then check that important surfaces and labels still read clearly.
For reflective products, you can bring in narrow white highlights or dark reflections to show shape. For matte products, a little raking light can reveal surface detail. Each material responds differently, so take a test frame and adjust one thing at a time. Light, flag, card, angle. Then shoot.

Save set-building time
Building a backdrop takes more than the build itself. You need time to source materials, dress the set, adjust it for the product, then clear it when you’re done.
At @38, dark industrial surfaces, exposed brick, steel and concrete are already part of the space. You can move between looks by changing your framing, product position and lighting, not by building a new set from scratch. For a campaign with a consistent industrial direction, that means more of your booked time can go toward the shots.
The venue has two connected spaces, giving your team room to work across different setups. Use one area for the main product frames and the other for prep or a change of look. There’s also a studio room available for talent or changing, with full exclusivity for your shoot.
Explore the shoot space to check the surfaces and setup, then book your shoot.
Plan the day around the shot list
Before you arrive, sort your products into groups: matte, glossy, reflective and transparent. That gives you a useful order for the day. You can keep similar lighting setups together rather than rebuilding your approach for every item.
Make a quick list of the frames you need:
- Hero product images against concrete, brick or steel.
- Close-ups that show packaging and surface detail.
- Wider campaign images with negative space for copy.
- Alternate angles or colour treatments for social and paid media.
Pack the essentials for your workflow: camera and lenses, tethering setup if you use one, product-cleaning cloths, cards or flags, and any props specific to the brief. Ask about your equipment and access requirements when you enquire. If you’re unsure which surface suits the product, arrange a site visit before shoot day.
@38 is a working creative space, not a blank cyclorama. That’s the point. You get texture in the frame without having to build it first.
Book your product shoot in Hackney
For your next campaign, choose the surface that supports the product: concrete for weight, brick for grit, steel for a harder edge. Then shape the light around it.
Shoot bookings start at £175 for up to 4 hours, with shoot days from £600. You get a raw industrial setting, two connected spaces and a backdrop that’s already there.
What product would you shoot against concrete? Comment below and tell us. DM us or book your shoot at at38.org. We respond within 24 hours.
Leave a Reply